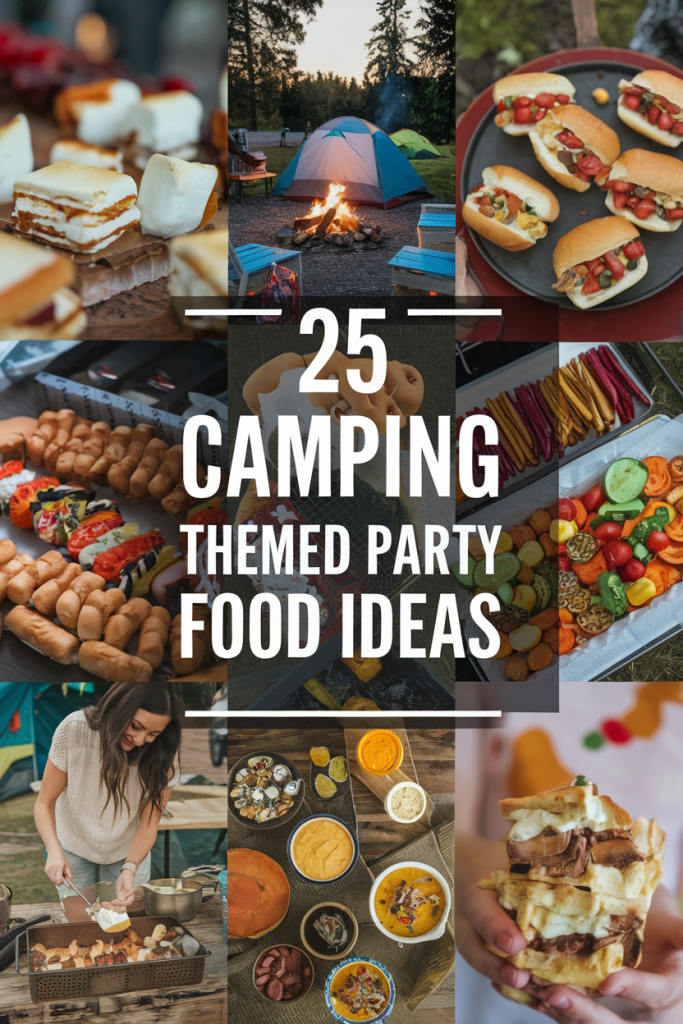
Planning a camping-themed party? You’ll want to keep the vibe relaxed and fun, and that starts with the food! Here are 25 easy camping-themed party food ideas that will delight your guests without requiring hours of prep time. Whether you’re thinking s’mores or savory snacks, these recipes will bring the spirit of the outdoors right to your table.
Campfire Hot Dog Twists – Crescent Roll-Wrapped Hot Dogs Cooked Over A Flame
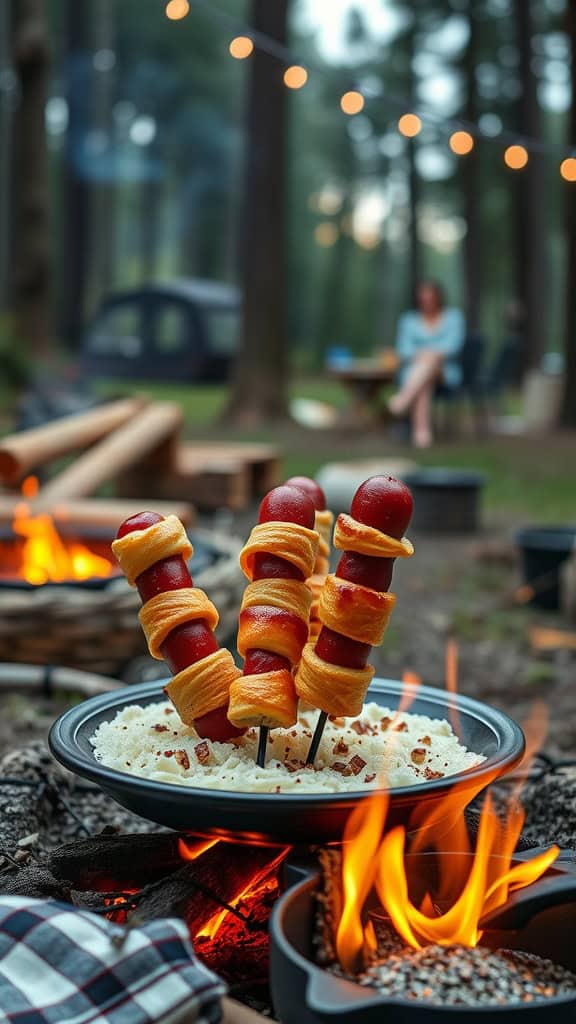
Campfire hot dog twists are a delightful treat that brings a little twist to your typical camping meal. The combination of juicy hot dogs wrapped in flaky crescent roll dough creates a savory snack that pairs perfectly with the great outdoors. This recipe is simple to whip up, making it an ideal choice for family gatherings or camping adventures.
Cooking these twists over an open flame adds a smoky flavor that enhances the taste. Kids and adults alike will love the interactive experience of roasting their own hot dog twists, making it a fun addition to any camping-themed party.
Ingredients
- 1 can of crescent roll dough
- 4 hot dogs
- 1 tablespoon of melted butter (optional)
- 1 teaspoon garlic powder (optional)
- 1 teaspoon dried herbs (like oregano or basil, optional)
- Skewers or roasting sticks
Instructions
- Prepare the Skewers: If using wooden skewers, soak them in water for about 30 minutes to prevent burning.
- Wrap the Hot Dogs: Preheat the campfire or grill. Unroll the crescent dough and separate it into triangles. Starting at one end of a hot dog, wrap the dough around it, overlapping slightly as you go. Leave the ends of the hot dog exposed for easy eating.
- Secure the Hot Dogs: Insert a skewer through the wrapped hot dog, ensuring it’s stable enough to hold while cooking.
- Cook Over the Flame: Hold the skewered hot dog twists over the campfire, rotating them occasionally until the dough is golden brown and the hot dogs are heated through, about 5-10 minutes.
- Brush with Butter: For extra flavor, brush the cooked twists with melted butter and sprinkle with garlic powder and dried herbs, if desired.
- Serve and Enjoy: Carefully remove the hot dogs from the skewers and serve them with your favorite condiments.
S’Mores Dip Delight – A Gooey, Baked Take On Classic S’Mores

S’Mores Dip Delight is a fun twist on the classic campfire treat that everyone loves. This gooey dessert blends the rich flavors of chocolate, marshmallows, and graham crackers into a warm, shareable dip that’s perfect for gatherings. The delightful combination of crispy and melty textures makes it a treat that will please both kids and adults alike.
Easy to whip up in just a few simple steps, this recipe is perfect for camping-themed parties or cozy nights at home. You can gather around with friends and enjoy dipping graham crackers into the ooey-gooey goodness. Get ready to indulge in a sweet experience!
Ingredients
- 1 cup chocolate chips
- 1 cup mini marshmallows
- 1/2 cup graham cracker crumbs
- 1/2 cup heavy cream
- 1 teaspoon vanilla extract
- 1/4 cup chopped chocolate bars (for topping)
- Graham crackers, for serving
- Marshmallows, for serving
Instructions
- Preheat your oven to 350°F (175°C).
- In a medium bowl, mix together the chocolate chips, mini marshmallows, graham cracker crumbs, heavy cream, and vanilla extract until well combined.
- Transfer the mixture into a small baking dish and spread it evenly.
- Sprinkle the chopped chocolate bars over the top for added richness.
- Bake in the preheated oven for about 15 minutes, or until the marshmallows are golden and the chocolate is melted.
- Remove from the oven and let cool slightly. Serve warm with graham crackers and extra marshmallows for dipping.
Walking S’Mores Bags – No-Fire S’Mores In Mini Snack Bags

Walking S’Mores Bags are a fun and simple way to enjoy the classic campfire treat without the need for a fire. These little snack bags pack all the flavors of traditional s’mores into a portable package that’s perfect for camping trips, picnics, or parties. They combine crunchy graham crackers, gooey marshmallows, and rich chocolate, making them a delightful treat that everyone will love.
Making these Walking S’Mores Bags is super easy! Just layer the ingredients in mini snack bags, and you’re ready to go. Whether you’re gathered around a campfire or lounging in your backyard, these no-fire s’mores allow you to enjoy a sweet treat anytime, anywhere.
Ingredients
- 1 cup graham cracker crumbs
- 1 cup mini marshmallows
- 1 cup chocolate chips
- 1/2 cup mini chocolate bars
- 1/4 cup peanut butter (optional)
- Small snack-sized zip-top bags
Instructions
- Prepare the Ingredients: In a large bowl, combine graham cracker crumbs, mini marshmallows, chocolate chips, and mini chocolate bars. If you like, you can also mix in some peanut butter for added flavor.
- Fill the Bags: Use small snack-sized zip-top bags to portion out the mixture. Fill each bag with an even amount of the s’mores mix.
- Seal and Store: Seal the bags tightly to keep the contents fresh. You can prepare these bags ahead of time and store them in a cool place until you’re ready to enjoy.
- Serve: Whenever you’re ready for a treat, just grab a bag and enjoy! You can nibble on the contents as is or pour them into a bowl for sharing.
Wilderness Trail Mix Cups – Customizable Trail Mix In Individual Cups
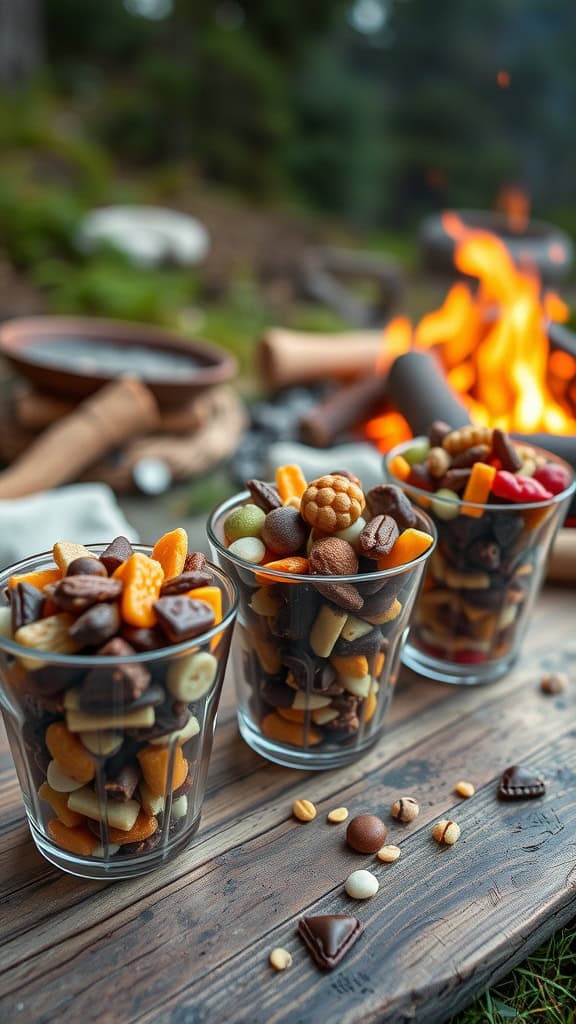
Wilderness Trail Mix Cups are a fun and easy treat that everyone can enjoy while camping or at a party. Each cup is packed with a mix of crunchy, chewy, and sweet bites that satisfy any craving. Best of all, they’re super simple to make and can be customized to fit any taste!
These individual cups offer a personalized snacking experience, allowing guests to mix and match their favorite ingredients. You can include nuts, dried fruits, candies, and even a bit of chocolate for a sweet touch. It’s a delightful way to keep energy levels high while exploring the great outdoors.
Ingredients
- 2 cups mixed nuts (almonds, cashews, walnuts)
- 1 cup dried cranberries
- 1 cup chocolate chips (dark or milk)
- 1 cup yogurt-covered raisins
- 1 cup granola
- 1 cup mini pretzels
- 1 cup coconut flakes (optional)
Instructions
- Prepare the Cups: Gather small cups or jars for serving. These can be disposable or reusable, depending on your preference.
- Mix the Ingredients: In a large bowl, combine all the ingredients. Feel free to adjust the amounts based on your favorites or any dietary restrictions.
- Fill the Cups: Spoon the trail mix into each individual cup, layering as desired for a colorful presentation.
- Serve and Enjoy: Set these cups out for your guests and let them enjoy their personalized snack while enjoying the outdoors!
Bear Paw Peanut Butter Cookies – Bear-Shaped Cookies For A Fun Touch
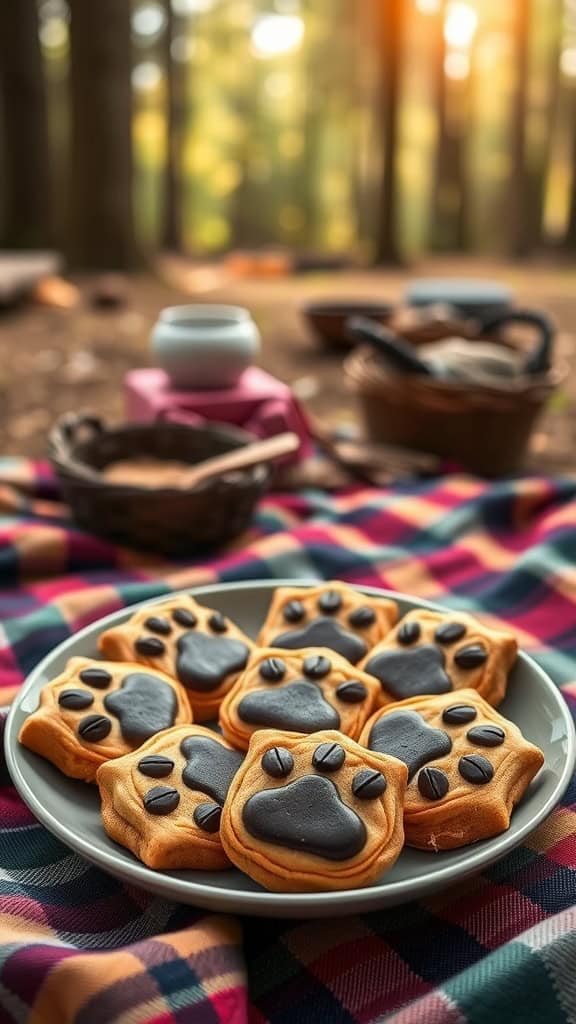
Bear Paw Peanut Butter Cookies are not only delicious but also bring a fun twist to any camping-themed party. With their soft, chewy texture and nutty flavor, these cookies are sure to be a hit with guests of all ages. Plus, they are super simple to whip up, making them a great choice for anyone, even those who might be new to baking.
These cookies are shaped like adorable bear paws, complete with chocolate accents for the paw pads. They’re perfect for sharing around the campfire or as a playful dessert at a picnic. Just imagine the smiles on everyone’s faces as they enjoy these delightful treats!
Ingredients
- 1 cup peanut butter
- 1 cup brown sugar
- 1 large egg
- 1 teaspoon vanilla extract
- 1/2 teaspoon baking soda
- 1/4 teaspoon salt
- 1/2 cup chocolate chips
- 1/4 cup icing (for decorating)
Instructions
- Preheat the Oven: Start by preheating your oven to 350°F (175°C) and lining a baking sheet with parchment paper.
- Mix the Dough: In a mixing bowl, combine peanut butter, brown sugar, egg, vanilla extract, baking soda, and salt. Mix until fully blended and smooth.
- Shape the Cookies: Scoop tablespoon-sized portions of the dough and roll them into balls. Flatten them slightly and use your fingers or a fork to create the bear paw shape, making four little indentations for the toes.
- Add Chocolate Chips: Place a chocolate chip in each of the four indentations to represent the paw pads.
- Bake: Arrange the shaped cookies on the prepared baking sheet and bake for about 10-12 minutes, or until they are set but still soft.
- Cool and Decorate: Allow the cookies to cool on the baking sheet for a few minutes before transferring them to a wire rack to cool completely. Once cooled, use icing to add any extra details.
Flaming Marshmallow Popcorn – Sweet And Salty Popcorn With Toasted Marshmallows
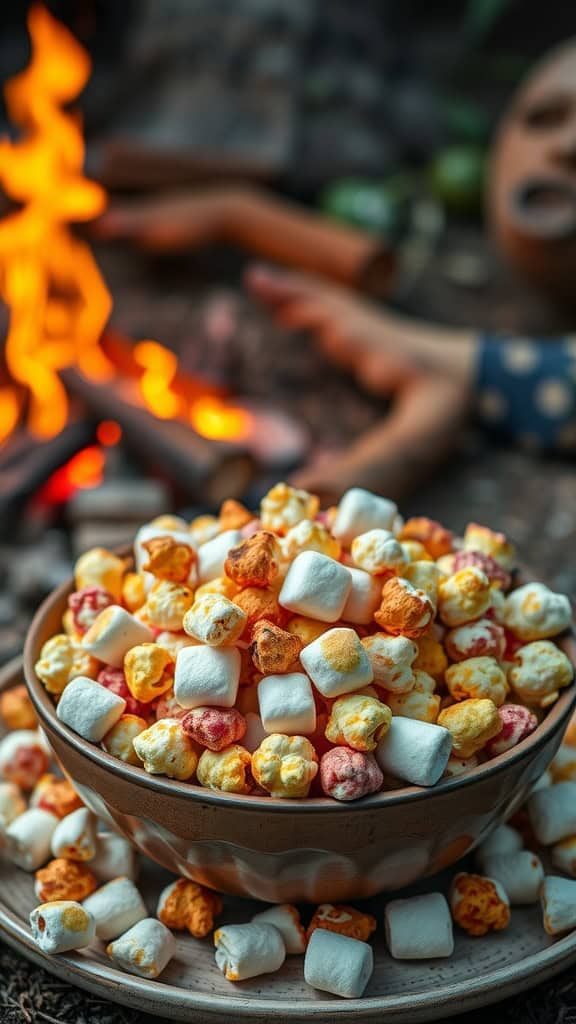
If you’re looking for a treat that combines the irresistible crunch of popcorn with the gooey goodness of toasted marshmallows, this flaming marshmallow popcorn is just what you need! The sweet and salty flavors create a delightful snack that’s perfect for camping trips or cozy movie nights at home.
This recipe is incredibly simple to make and requires just a few ingredients. The combination of crispy popcorn and soft marshmallows creates a fun texture that kids and adults will both love. Plus, it’s a great way to enjoy that classic campfire treat without needing a fire!
Ingredients
- 8 cups popped popcorn (about 1/2 cup unpopped)
- 2 cups mini marshmallows
- 1/2 cup unsalted butter
- 1/2 cup brown sugar
- 1/4 teaspoon salt
- 1/2 teaspoon vanilla extract
- 1/4 cup candy melts (optional, for added color)
Instructions
- Prepare the Popcorn: Pop your popcorn using an air popper or on the stovetop. Place the popped popcorn in a large bowl, making sure to remove any unpopped kernels.
- Make the Marshmallow Sauce: In a saucepan over medium heat, melt the butter. Stir in the brown sugar, salt, and vanilla extract, cooking until the mixture is bubbly. Add the mini marshmallows and stir until they are melted and combined.
- Combine Ingredients: Pour the marshmallow mixture over the popcorn. Gently stir to coat the popcorn evenly.
- Optional Step: If using candy melts, melt them in the microwave according to package instructions. Drizzle the melted candy over the popcorn for a pop of color.
- Cool and Serve: Allow the popcorn to cool slightly before serving. Enjoy your sweet and salty flaming marshmallow popcorn!
One Happy Camper Cupcakes – Campfire-Inspired Cupcakes With Flaming Frosting

If you’re looking for a delightful treat that captures the spirit of the great outdoors, these One Happy Camper Cupcakes are just the thing! With their rich chocolate flavor and vibrant, flame-like frosting, they’re sure to bring a smile to everyone’s face. Plus, they’re simple to whip up, making them a fun project for both kids and adults.
These campfire-inspired cupcakes combine the classic taste of chocolate with a colorful, buttercream frosting that resembles dancing flames. Perfect for camping-themed parties or any outdoor gathering, these cupcakes will be a hit with guests of all ages.
Ingredients
- 1 box chocolate cake mix
- 3 large eggs
- 1 cup water
- 1/2 cup vegetable oil
- 1 cup unsalted butter, softened
- 4 cups powdered sugar
- 1/4 cup cocoa powder
- 1 teaspoon vanilla extract
- 1/4 teaspoon salt
- Red and yellow gel food coloring
Instructions
- Prepare the Cupcakes: Preheat your oven to 350°F (175°C). Line a cupcake pan with paper liners. In a large bowl, combine the cake mix, eggs, water, and vegetable oil. Mix until smooth and pour the batter into the prepared cupcake liners, filling each about two-thirds full.
- Bake the Cupcakes: Bake for 18-20 minutes, or until a toothpick inserted into the center comes out clean. Remove from the oven and let them cool completely on a wire rack.
- Make the Frosting: In a large bowl, beat together the softened butter, powdered sugar, cocoa powder, vanilla extract, and salt until light and fluffy. Add a splash of milk if needed for consistency.
- Color the Frosting: Divide the frosting into two bowls. In one bowl, mix in red food coloring, and in the other, mix in yellow food coloring. Use the gel food coloring to achieve the desired brightness.
- Pipe the Frosting: Using a piping bag fitted with a star tip, alternate between red and yellow frosting to create a flame effect on each cupcake, starting at the base and swirling upwards.
- Serve and Enjoy: Arrange the cupcakes on a plate and enjoy your campfire-themed treats!
Tent-Shaped Sandwiches – Fun-Shaped Sandwiches For A Camp-Themed Touch
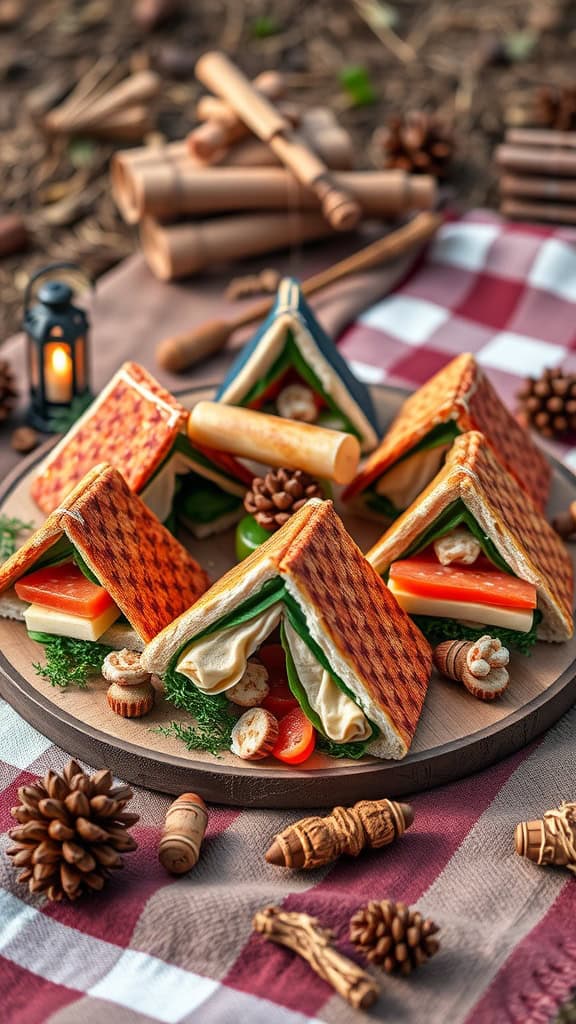
Tent-shaped sandwiches are a playful twist on traditional sandwiches that bring a taste of the outdoors right to your table. These fun-shaped sandwiches are not only visually appealing but also packed with flavor, making them a hit at any camping-themed gathering. They are simple to prepare, allowing you to spend more time enjoying the company of friends and family.
With a combination of fresh veggies, delicious spreads, and your choice of proteins, these sandwiches are customizable for everyone’s taste. Perfect for lunch or as a party snack, they evoke the spirit of camping while keeping things light and fun.
Ingredients
- 8 slices of bread (your choice)
- 4 slices of cheese (such as cheddar or mozzarella)
- 1 cup deli meats (like turkey or ham)
- 1 cup mixed greens
- 1/2 cup sliced bell peppers
- 1/2 cup cucumber slices
- 1/4 cup ranch dressing or hummus
- Olives for decoration (optional)
Instructions
- Prepare the Ingredients: Start by laying out all your ingredients. Cut the bread slices into triangles to create the tent shape.
- Layer the Sandwich: On one slice of the triangle bread, spread a layer of ranch dressing or hummus. Add cheese, deli meats, mixed greens, and bell peppers. Top with another triangle slice of bread.
- Assemble the Tents: For the tent shape, you can stack two triangle slices at an angle to form a peak. Insert a toothpick through the top to hold it together if needed.
- Decorate: Use olives or small pieces of veggies to create a decorative touch that resembles tent stakes or campfire items.
- Serve: Arrange your tent-shaped sandwiches on a platter and enjoy them fresh!
Bonfire Pretzel Sticks – Chocolate-Dipped Pretzels With ‘Flame’ Sprinkles
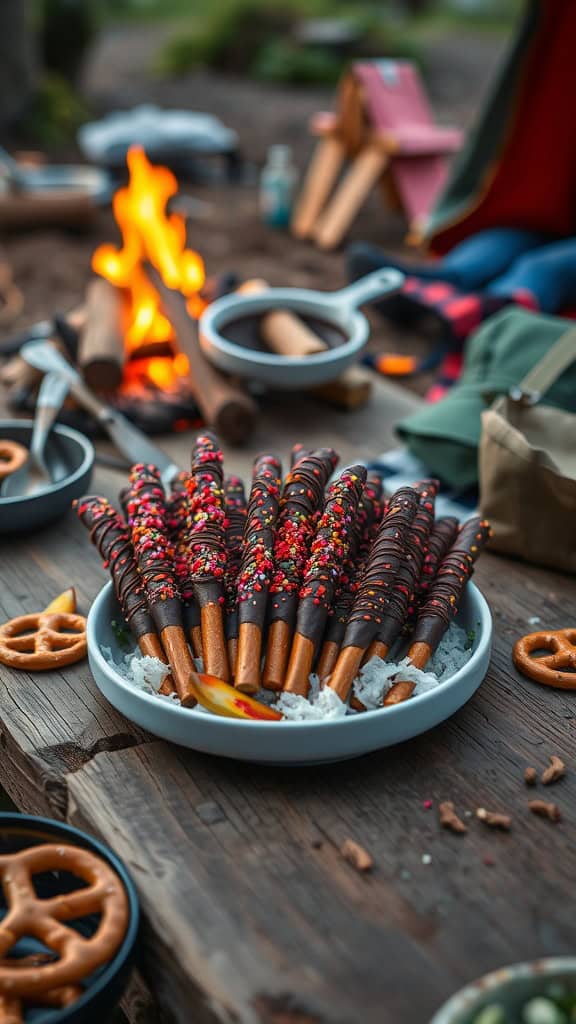
Bonfire Pretzel Sticks are a fun and tasty treat that perfectly captures the spirit of camping. These chocolate-dipped pretzels combine the salty crunch of pretzels with the smooth sweetness of chocolate, creating a delightful contrast that everyone will love. They’re simple to make, making them an ideal snack for a camping-themed party or a cozy bonfire night.
To add a playful touch, these pretzel sticks are topped with colorful ‘flame’ sprinkles, evoking the vibrant colors of a campfire. They’re not just delicious; they also make a great centerpiece for your outdoor gathering. Here’s how you can whip up this delightful snack.
Ingredients
- 1 cup pretzel rods
- 1 cup semi-sweet chocolate chips
- 1 tablespoon coconut oil
- 1/4 cup red, orange, and yellow sprinkles
- Optional: sea salt for sprinkling
Instructions
- Melt the Chocolate: In a microwave-safe bowl, combine the chocolate chips and coconut oil. Heat in the microwave in 30-second intervals, stirring in between until smooth.
- Dip the Pretzels: Hold a pretzel rod by one end and dip it into the melted chocolate, coating about two-thirds of the stick. Gently shake off excess chocolate.
- Add Sprinkles: While the chocolate is still wet, roll the dipped part of the pretzel in the ‘flame’ sprinkles to coat. If desired, sprinkle a little sea salt on top for a sweet-salty flavor.
- Set and Enjoy: Place the dipped pretzels on a baking sheet lined with parchment paper. Allow them to set at room temperature or refrigerate until the chocolate hardens. Serve them in a fun bowl or stand them upright in a jar for a festive display.
Lumberjack Pancake Bites – Mini Pancakes Served With Syrup For Dipping
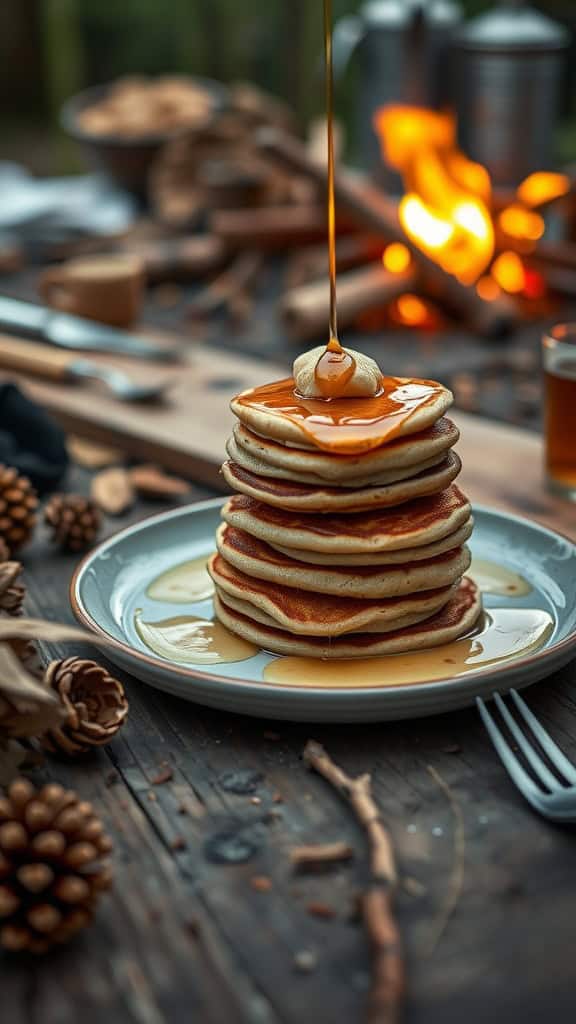
Lumberjack Pancake Bites are a delightful twist on traditional pancakes, designed to be fun and easy for any camping-themed gathering. These mini pancakes are fluffy and golden, offering just the right amount of sweetness, making them perfect for a breakfast or dessert option. They’re simple to make and can be easily dipped in syrup, adding to the interactive fun of your outdoor party.
Not only do these pancake bites taste delicious, but they also bring a rustic charm that fits perfectly with a camping theme. Everyone can enjoy stacking their pancakes and drizzling syrup over them just the way they like. It’s an enjoyable experience that’s sure to leave everyone smiling!
Ingredients
- 1 cup all-purpose flour
- 2 tablespoons sugar
- 1 tablespoon baking powder
- 1/4 teaspoon salt
- 1 cup milk
- 1 large egg
- 2 tablespoons melted butter
- Syrup for dipping
Instructions
- In a mixing bowl, combine the flour, sugar, baking powder, and salt.
- In another bowl, whisk together the milk, egg, and melted butter.
- Pour the wet ingredients into the dry ingredients and mix until just combined, being careful not to overmix.
- Heat a non-stick skillet over medium heat and lightly grease it. Pour small amounts of batter onto the skillet to form mini pancakes.
- Cook until small bubbles form on the surface, then flip and cook until golden brown on the other side.
- Serve warm with syrup for dipping, and enjoy your Lumberjack Pancake Bites!
Glamping Fruit Skewers – Colorful Fruit Kabobs With A Drizzle Of Honey

Glamping fruit skewers are the ultimate treat for any outdoor gathering. These vibrant kabobs combine a delicious mix of fresh fruits, bringing a burst of natural sweetness with each bite. They are not only easy to prepare but also look stunning on any picnic table.
The simplicity of this recipe makes it a go-to choice. Just chop your favorite fruits, arrange them on skewers, and drizzle with honey for that extra touch of sweetness. It’s a fun way to enjoy healthy snacks while soaking up the great outdoors!
Ingredients
- 1 cup strawberries, hulled and halved
- 1 cup pineapple, cut into squares
- 1 cup green grapes
- 1 cup kiwi, peeled and sliced
- 1/2 cup blackberries
- Honey, for drizzling
- Wooden skewers
Instructions
- Prepare the Skewers: Start by washing all your fruits thoroughly. Cut the strawberries, pineapple, and kiwi into bite-sized pieces.
- Assemble the Kabobs: Take a wooden skewer and thread the fruits onto it in any order you like. Alternate colors and shapes for a visually appealing presentation.
- Drizzle with Honey: Once all the skewers are assembled, place them on a serving platter and drizzle honey over them for added sweetness.
- Serve and Enjoy: These fruit skewers are best enjoyed fresh. Serve them immediately, or keep them chilled until ready to eat.
Fishing Pond Jello Cups – Blue Jello With Gummy Fish Inside
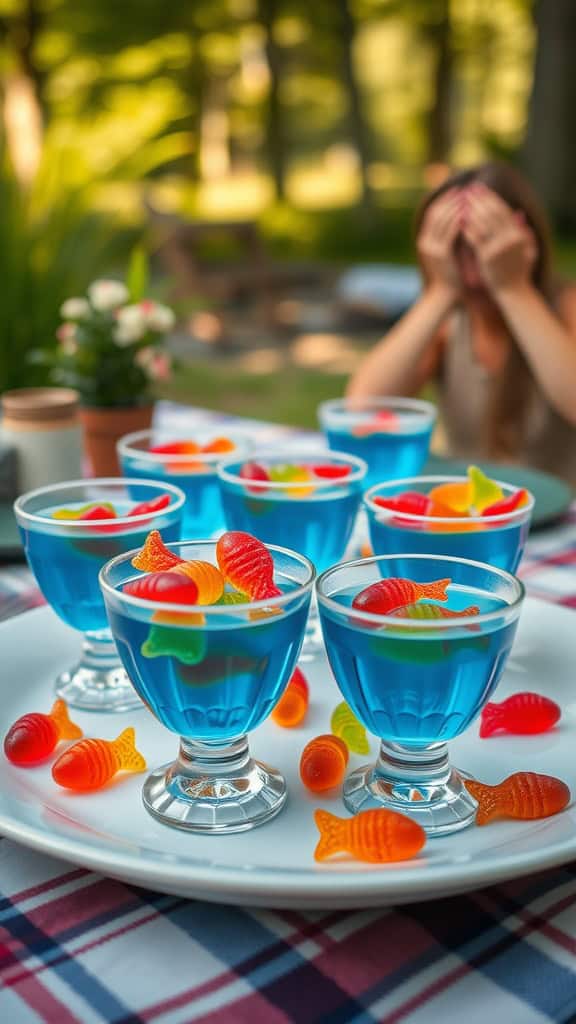
Fishing Pond Jello Cups are a fun and playful treat that perfectly capture the spirit of a camping-themed party. The cool blue jello mimics a serene pond, while the gummy fish add a delightful twist that kids and adults alike will love. This recipe is not only simple to make but also brings a splash of color and creativity to your dessert table.
With just a few ingredients, you can create these charming cups that are sure to be a hit at any gathering. They’re refreshing, sweet, and sure to bring smiles all around. Dive into this easy recipe for a taste of nostalgia!
Ingredients
- 2 cups boiling water
- 1 package (3 oz) blue raspberry jello
- 1 cup cold water
- 1 cup gummy fish candies
- Clear plastic cups or small dessert cups
Instructions
- In a mixing bowl, dissolve the blue raspberry jello in 2 cups of boiling water. Stir well until fully dissolved.
- Add 1 cup of cold water to the jello mixture and stir until combined.
- Pour the jello mixture into clear plastic cups, filling them about halfway.
- Refrigerate the cups for about 2 hours, or until the jello is set.
- Once set, carefully place the gummy fish on top of the jello in each cup. You can add more jello if needed to ensure the fish are partially submerged.
- Return the cups to the refrigerator for another 30 minutes to allow the jello to firm up again.
- Serve chilled and enjoy your Fishing Pond Jello Cups!
Campfire Chili Bowls – Easy, Hearty Chili Served In Edible Bread Bowls
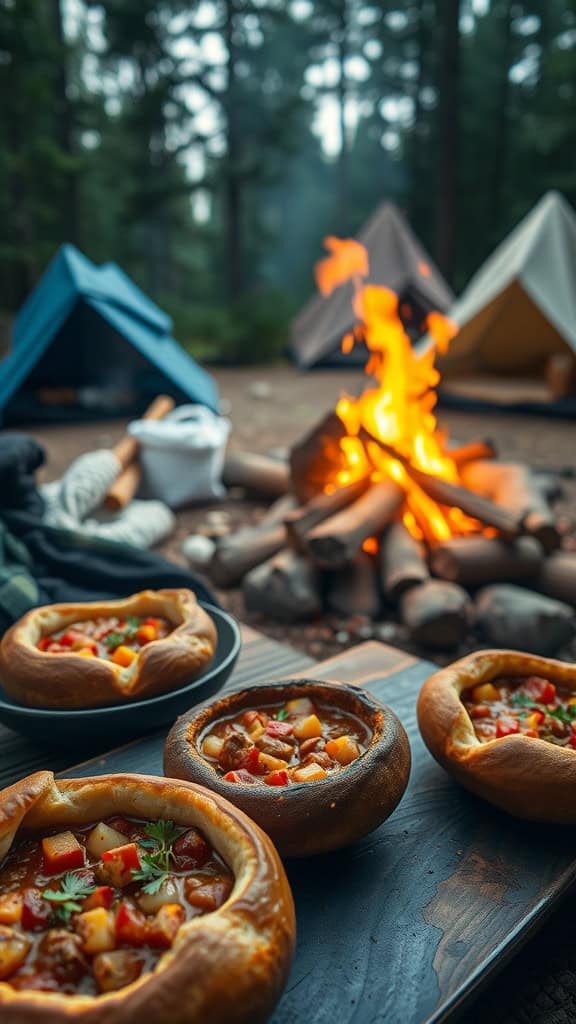
Campfire chili bowls are a fantastic way to combine comfort food with the fun of outdoor cooking. This hearty dish features a rich, flavorful chili served in warm, edible bread bowls that you can eat after finishing the chili. The blend of spices and tender ingredients creates a satisfying taste that everyone will enjoy.
Making these chili bowls is simple and perfect for a camping trip or a cozy night at home. The recipe allows you to customize your chili with your favorite ingredients, and the bread bowls add a unique twist. Here’s how to make your own:
Ingredients
- 1 pound ground beef or turkey
- 1 can (15 oz) kidney beans, drained and rinsed
- 1 can (15 oz) diced tomatoes
- 1 onion, chopped
- 1 bell pepper, chopped
- 2 cloves garlic, minced
- 2 tablespoons chili powder
- 1 teaspoon cumin
- Salt and pepper to taste
- 4 large bread bowls
- Shredded cheese and sour cream for topping (optional)
Instructions
- Cook the Meat: In a large pot over medium heat, brown the ground beef or turkey. Drain any excess fat.
- Add Vegetables: Stir in the onion, bell pepper, and garlic, cooking until the vegetables are tender.
- Mix the Chili: Add the kidney beans, diced tomatoes, chili powder, cumin, salt, and pepper. Simmer for about 20-30 minutes, allowing the flavors to meld.
- Prepare the Bread Bowls: While the chili simmers, preheat your oven to 350°F (175°C). Hollow out the bread bowls, removing some of the insides to create space for the chili.
- Bake the Bread Bowls: Place the hollowed bread bowls on a baking sheet and bake for about 10 minutes until they are slightly crisp.
- Serve: Ladle the chili into the warm bread bowls and top with shredded cheese and sour cream if desired. Enjoy your meal by the campfire!
Scout’S Honor S’Mores Bars – S’Mores-Inspired Dessert Bars
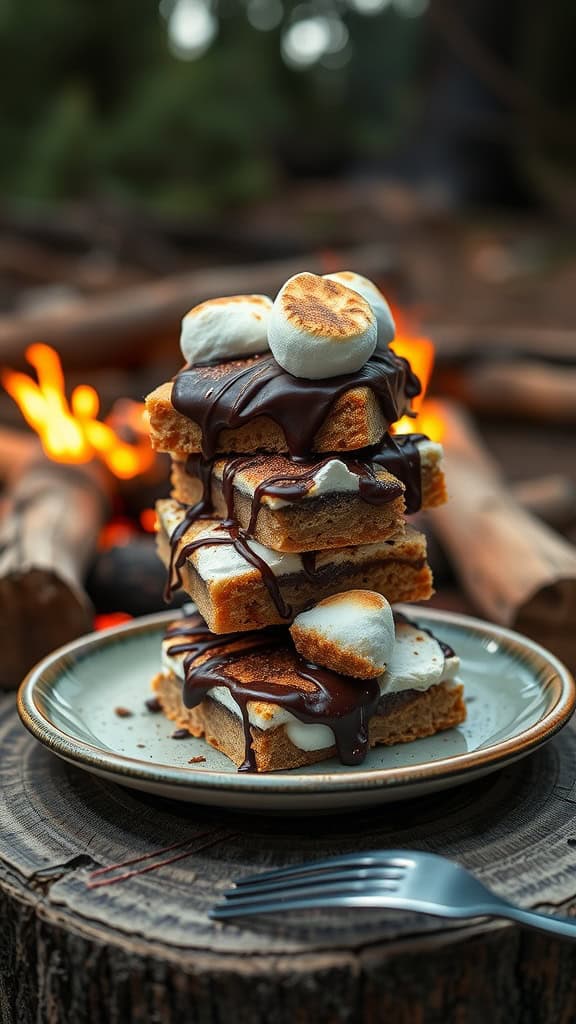
Scout’s Honor S’Mores Bars are the perfect treat to bring the classic campfire experience right to your table. These dessert bars blend the rich flavors of chocolate, graham crackers, and toasted marshmallows in a simple and enjoyable way. With a chewy texture and a satisfying crunch, every bite captures that nostalgic taste of outdoor adventures.
Making these bars is straightforward, making them a great choice for your camping-themed party. They’re easy to prepare ahead of time, so you can enjoy more time with friends and family by the fire. Let’s dive into the recipe!
Ingredients
- 1 ½ cups graham cracker crumbs
- ½ cup unsalted butter, melted
- ½ cup granulated sugar
- 1 cup chocolate chips
- 2 cups mini marshmallows
- 1 teaspoon vanilla extract
- ¼ teaspoon salt
Instructions
- Prepare the Base: Preheat your oven to 350°F (175°C). In a mixing bowl, combine the graham cracker crumbs, melted butter, sugar, and salt until blended. Press this mixture evenly into the bottom of a greased 9×9 inch baking pan.
- Add Chocolate: Sprinkle the chocolate chips evenly over the graham cracker crust, covering it well.
- Toast the Marshmallows: Spread the mini marshmallows on top of the chocolate layer. Bake in the preheated oven for about 15 minutes, or until the marshmallows are golden brown and puffed up.
- Cool and Cut: Allow the bars to cool completely in the pan before slicing into squares. Serve them warm or at room temperature for a delightful dessert that everyone will love!
Moose Munch Caramel Popcorn – Caramel Popcorn With Nuts And Chocolate

Moose Munch Caramel Popcorn is a delightful treat that combines the crunch of popcorn with sweet caramel and a hint of chocolate. This snack is not only tasty but also easy to make, making it perfect for your camping-themed party. The combination of buttery caramel, crunchy nuts, and rich chocolate creates a symphony of flavors that will leave everyone wanting more.
Whether you’re enjoying a night under the stars or just snacking at home, this caramel popcorn is a crowd-pleaser. It’s simple to whip up and can be made ahead, allowing you to spend more time enjoying the great outdoors with friends and family.
Ingredients
- 10 cups popped popcorn
- 1 cup brown sugar
- 1/2 cup unsalted butter
- 1/4 cup light corn syrup
- 1/2 teaspoon salt
- 1/4 teaspoon baking soda
- 1 cup mixed nuts (like pecans and almonds)
- 1/2 cup chocolate chips
Instructions
- Preheat your oven to 250°F (120°C) and line a baking sheet with parchment paper.
- In a saucepan, combine brown sugar, butter, corn syrup, and salt. Stir over medium heat until it comes to a boil. Allow it to boil for 4-5 minutes without stirring.
- Remove from heat and carefully stir in baking soda. The mixture will bubble up, so be cautious!
- Pour the caramel over the popcorn in a large bowl and mix well to coat evenly. Add the mixed nuts and stir again.
- Spread the popcorn mixture onto the prepared baking sheet and bake for 45 minutes, stirring every 15 minutes.
- Once done, remove from the oven and let it cool slightly. Drizzle with melted chocolate chips and allow it to set before breaking into pieces.
Log Cabin Cheese & Crackers – Cheese And Crackers Stacked Like Logs

This fun and creative treat is perfect for a camping-themed party. Stacking cheese and crackers to resemble a log cabin not only makes for a delightful presentation but also offers a delicious combination of flavors. The crunch of the crackers and the creamy cheese come together in a way that’s sure to please everyone at your gathering.
Making this snack is simple and requires minimal ingredients. Just layer your favorite cheeses between stacks of crackers, and you’re ready to serve a playful yet elegant appetizer that fits right into your outdoor festivities!
Ingredients
- 1 package of assorted crackers (like saltines, wheat thins, or similar)
- 8 ounces of cheddar cheese, sliced
- 8 ounces of cream cheese, softened
- Fresh herbs (like dill or chives) for garnish
- Optional: sliced salami or pepperoni for extra flavor
Instructions
- Prepare the Base: Start by laying out a base of crackers on a platter.
- Add Cheese Layers: Place a slice of cheddar cheese on top of a cracker, followed by another cracker. Repeat this process to create multiple layers, resembling a log cabin.
- Incorporate Cream Cheese: Spread softened cream cheese on some of the crackers for added creaminess, then stack with another cracker.
- Garnish: Top off your log cabin with fresh herbs for a touch of color and flavor. You can also tuck in slices of salami or pepperoni between the layers if desired.
- Serve: Enjoy your log cabin cheese and crackers as a fun party snack that’s easy to eat and share!
Treehouse Veggie Cups – Individual Veggie Cups With Ranch Dressing
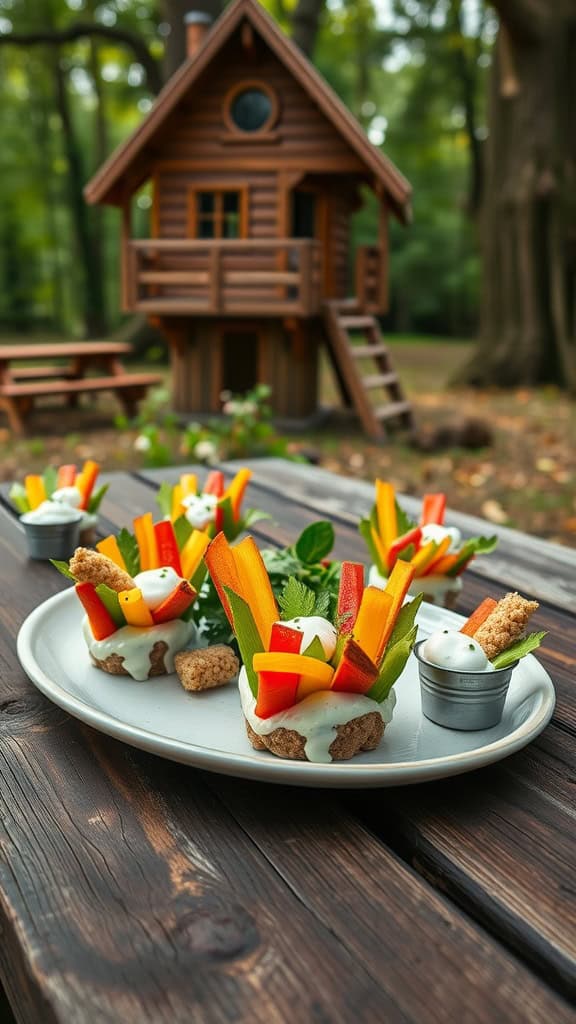
Treehouse Veggie Cups are a fun and colorful way to enjoy fresh vegetables at your camping-themed party. These individual veggie cups are filled with an assortment of crisp vegetables and paired with ranch dressing for a tasty dip. They’re simple to prepare and perfect for a casual outdoor gathering.
The refreshing crunch of the veggies, combined with the creamy ranch dressing, makes these cups a delightful snack for guests of all ages. Plus, they offer a healthy option alongside other party foods. You can customize the veggie selection based on your preferences or what’s in season, making them versatile for any occasion.
Ingredients
- 1 cup cherry tomatoes
- 1 cup cucumber sticks
- 1 cup carrot sticks
- 1 cup bell pepper strips (red, yellow, or green)
- 1 cup celery sticks
- 1 cup ranch dressing
- 6 small cups or jars
- Fresh herbs for garnish (optional)
Instructions
- Prepare the Vegetables: Wash and cut the cherry tomatoes, cucumbers, carrots, bell peppers, and celery into sticks or bite-sized pieces.
- Assemble the Cups: In each small cup or jar, add a layer of ranch dressing at the bottom. Then, arrange the vegetable sticks vertically in the cup, mixing colors and varieties for a vibrant presentation.
- Garnish: If desired, top with fresh herbs like parsley or dill for an added touch of flavor and color.
- Serve: Place the completed veggie cups on a platter and enjoy as a refreshing snack at your outdoor gathering.
Bear Tracks Chocolate Pudding – Pudding With Crushed Cookies And Bear Paw Prints
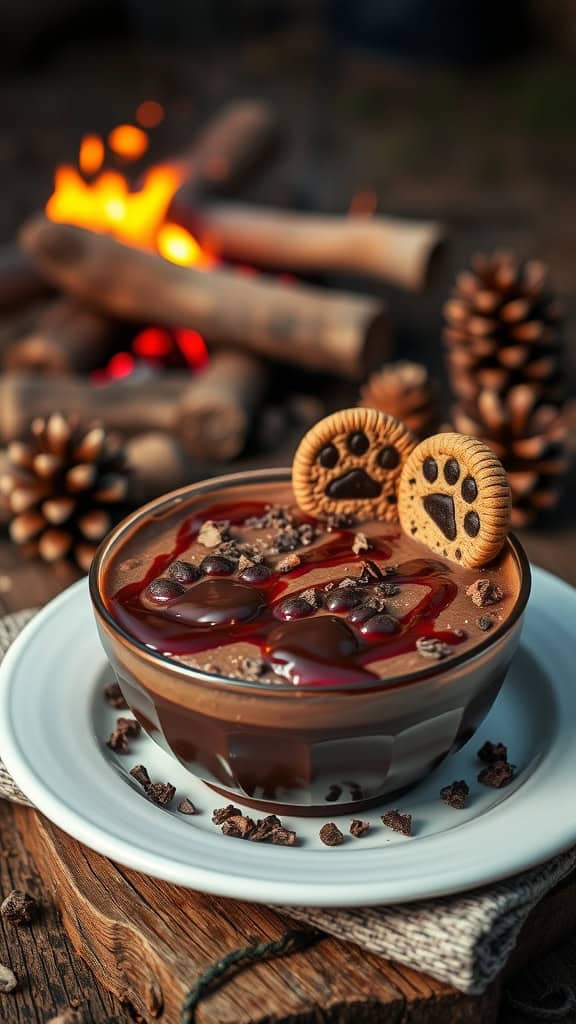
Bear Tracks Chocolate Pudding is a delightful dessert that combines rich chocolate flavor with a fun, whimsical presentation. This pudding is not only tasty but also easy to make, making it a fantastic choice for camping-themed parties or any gathering where fun and simplicity are key.
The creamy chocolate pudding is layered with crushed cookies, adding a crunchy texture that kids and adults alike will enjoy. The cute bear paw prints on top give it an adventurous theme that ties in perfectly with outdoor fun. Prepare to impress your guests with this delicious treat that’s sure to bring smiles all around!
Ingredients
- 1 3/4 cups milk
- 1/2 cup granulated sugar
- 1/3 cup unsweetened cocoa powder
- 1/4 cup cornstarch
- 1/8 teaspoon salt
- 1 teaspoon vanilla extract
- 1 cup heavy cream
- 1 cup crushed chocolate cookies
- Chocolate syrup (for drizzle)
- Bear paw print cookies (for decoration)
Instructions
- Make the Pudding: In a saucepan, whisk together milk, sugar, cocoa powder, cornstarch, and salt over medium heat. Stir constantly until the mixture thickens and begins to bubble. Remove from heat and stir in vanilla.
- Chill the Pudding: Pour the pudding into serving bowls or cups and let it cool at room temperature for about 10 minutes. Then, cover with plastic wrap directly on the surface and refrigerate for at least 2 hours until set.
- Add the Layers: Once the pudding is set, layer crushed cookies on top of the pudding in each bowl.
- Decorate: Drizzle chocolate syrup over the cookies and place bear paw print cookies on top for decoration.
- Serve: Enjoy this fun dessert with friends and family, perfect for any camping-themed party!
Campsite Mac & Cheese Bites – Baked, Bite-Sized Mac And Cheese Balls
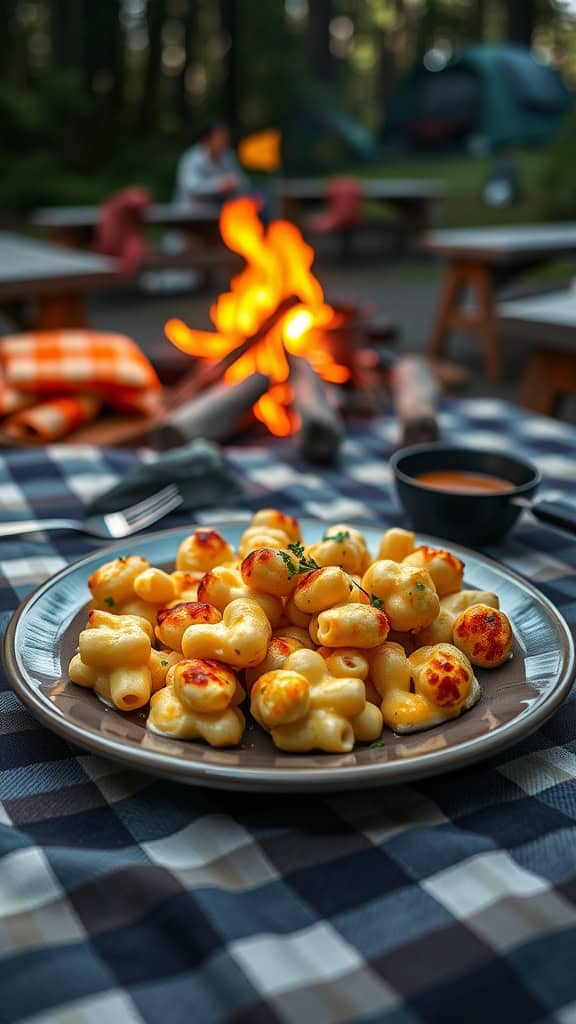
Campsite Mac & Cheese Bites are the ultimate comfort food with a camping twist! These baked, bite-sized mac and cheese balls are creamy, cheesy, and packed with flavor. They make for a fun and easy snack that’s perfect for sharing around the campfire with friends and family. Plus, they can be prepared ahead of time, making them a convenient option for your outdoor adventure.
These delicious bites are crispy on the outside and gooey on the inside, delivering that classic mac and cheese taste in a portable form. Kids and adults alike will love these tasty morsels, and they pair perfectly with a side of marinara or your favorite dipping sauce. Get ready for a crowd-pleaser!
Ingredients
- 2 cups cooked macaroni
- 2 cups shredded cheese (cheddar or your choice)
- 1/2 cup milk
- 1 large egg
- 1/2 cup breadcrumbs
- 1/4 teaspoon garlic powder
- 1/4 teaspoon onion powder
- Salt and pepper to taste
- Fresh parsley for garnish (optional)
Instructions
- Preheat your oven to 375°F (190°C) and grease a baking sheet.
- In a large bowl, combine the cooked macaroni, shredded cheese, milk, and egg. Mix well until combined.
- In a separate bowl, mix the breadcrumbs with garlic powder, onion powder, salt, and pepper.
- Using your hands, form the macaroni mixture into small balls, then roll them in the breadcrumb mixture to coat.
- Place the coated mac and cheese balls on the prepared baking sheet. Bake for 20-25 minutes, or until golden brown and crispy.
- Remove from the oven and let cool slightly. Garnish with fresh parsley if desired, and serve with your favorite dipping sauce.
Happy Camper Banana Boats – Bananas Stuffed With Chocolate And Marshmallows
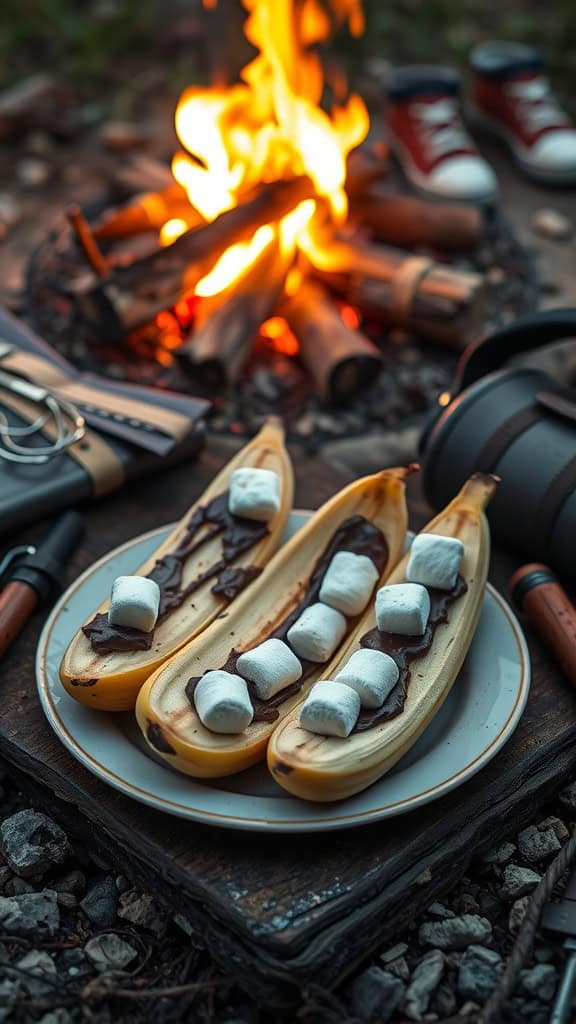
The Happy Camper Banana Boat is a fun and delicious treat that’s perfect for any camping-themed gathering. It combines the natural sweetness of bananas with gooey chocolate and soft marshmallows, creating a delightful dessert that everyone will love. This recipe is not only easy to prepare but also requires minimal ingredients, making it an ideal choice for a quick campfire snack.
As the bananas roast over the fire, the chocolate melts and the marshmallows get all gooey, resulting in a warm and comforting dessert that’s sure to satisfy your sweet tooth. Grab some skewers and gather around the campfire – this dessert is as entertaining to make as it is tasty!
Ingredients
- 4 ripe bananas
- 1 cup mini marshmallows
- 1 cup chocolate chips (or chocolate bar, chopped)
- Aluminum foil
Instructions
- Preheat the Campfire: Start by preparing your campfire, ensuring that the flames have settled down to a nice, hot bed of coals.
- Prepare the Bananas: Take the bananas and make a lengthwise slit along each one, being careful not to cut all the way through. Gently open up the banana to create a pocket.
- Stuff the Bananas: Fill the pocket of each banana with mini marshmallows and chocolate chips. Be generous!
- Wrap in Foil: Carefully wrap each stuffed banana in aluminum foil, making sure it’s fully covered to keep the heat in.
- Cook Over the Fire: Place the wrapped bananas on the grill or directly on the coals and let them cook for about 5-10 minutes. Keep an eye on them to ensure they don’t burn.
- Unwrap and Enjoy: Once the chocolate and marshmallows are melted and bubbly, carefully remove the banana boats from the fire. Unwrap the foil and dig in with a spoon!
Fishing Rod Pretzel Sticks – Pretzel Sticks Dipped In Chocolate With Gummy Worms
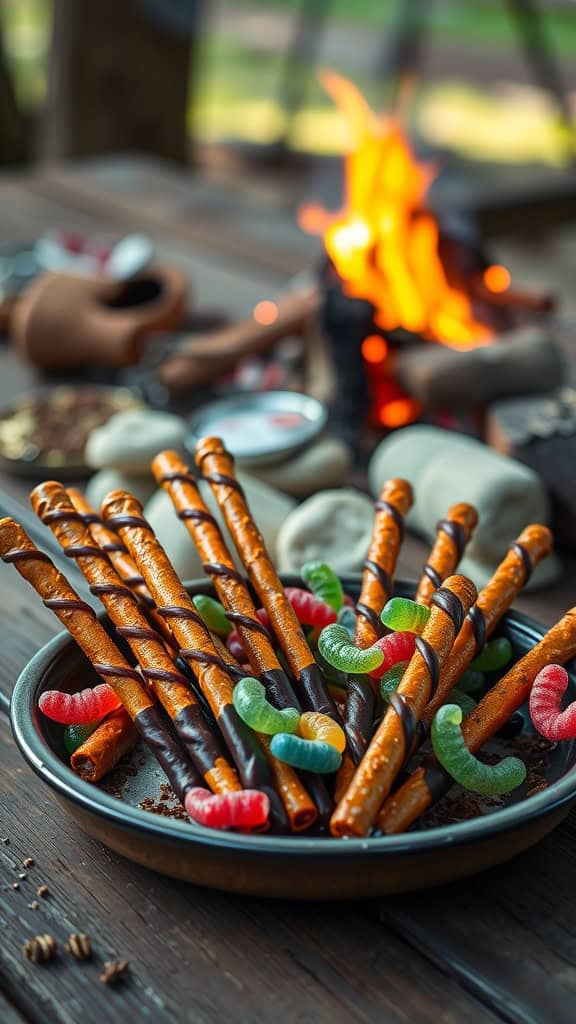
Fishing Rod Pretzel Sticks are a fun and tasty treat that fits perfectly into any camping-themed party. Combining the crunch of pretzel sticks with the smooth sweetness of chocolate, these snacks are not only delightful to eat but also a breeze to make. Plus, the gummy worms add a playful touch that kids and adults alike will love.
This recipe is great for those who want to whip up something simple yet enjoyable. It’s easy to customize by choosing different types of chocolate or gummy candies, making it a versatile option for any gathering. Get ready for some fishing fun!
Ingredients
- 8 oz pretzel rods
- 1 cup milk chocolate chips
- 1 cup dark chocolate chips
- 1 cup gummy worms
Instructions
- Melt the Chocolate: In separate bowls, melt the milk chocolate and dark chocolate chips in the microwave, stirring every 30 seconds until smooth.
- Dip the Pretzels: Dip each pretzel rod halfway into the melted chocolate, allowing any excess to drip off.
- Add the Swirl: For a fun effect, drizzle the dark chocolate over the milk chocolate-dipped pretzels using a fork.
- Decorate: While the chocolate is still wet, add gummy worms by pressing them onto the chocolate-dipped portions of the pretzels.
- Cool: Place the decorated pretzels on a parchment-lined baking sheet and refrigerate until the chocolate hardens, about 30 minutes.
Outdoor Adventure Mini Pizzas – Personal Pizzas Shaped Like Tents Or Campfires
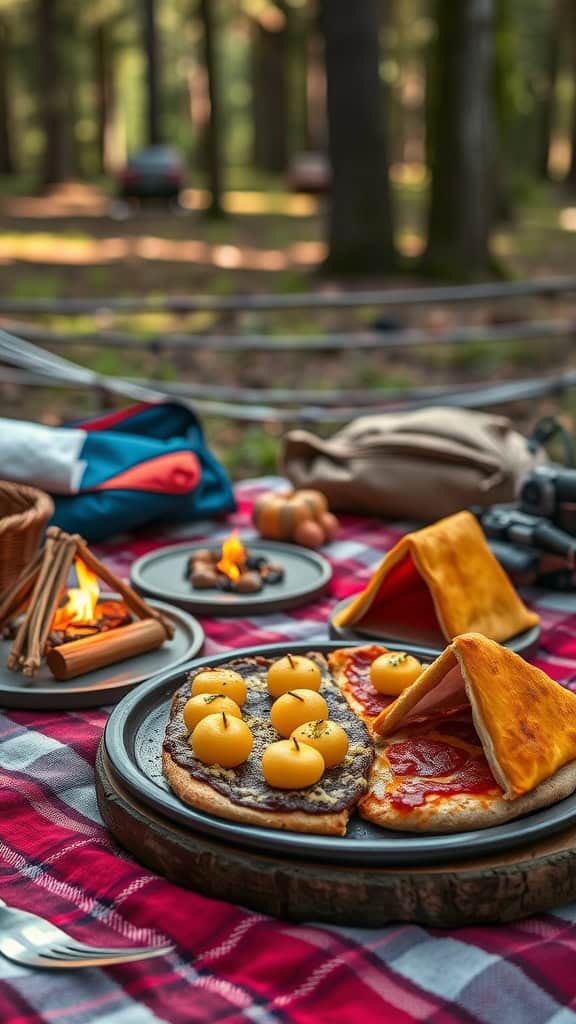
These Outdoor Adventure Mini Pizzas are a delightful twist on a camping favorite. Shaped like tents or campfires, they bring a fun, memorable element to any outdoor gathering. With crispy crusts topped with your favorite ingredients, these mini pizzas are not only tasty but also easy to make. They’re perfect for kids and adults alike!
To create these adorable pizzas, simply use pre-made dough to form the shapes and add toppings such as sauce, cheese, and your choice of veggies or meats. Bake them until golden and bubbly, and you’ll have a snack that’s as enjoyable to eat as it is to look at.
Ingredients
- 1 package of pre-made pizza dough
- 1 cup pizza sauce
- 2 cups shredded mozzarella cheese
- Your choice of toppings (pepperoni, bell peppers, mushrooms, etc.)
- Olive oil for brushing
- Fresh herbs for garnish (optional)
Instructions
- Preheat your oven to 425°F (220°C).
- Roll out the pizza dough on a floured surface and cut it into small triangles for tents or circles for campfires.
- Place the shapes on a baking sheet lined with parchment paper.
- Brush each shape lightly with olive oil, then spread a layer of pizza sauce on top.
- Add shredded mozzarella cheese and your selected toppings.
- Bake in the preheated oven for 12-15 minutes, or until the crust is golden brown and the cheese is bubbly.
- Remove from the oven, let cool slightly, and garnish with fresh herbs if desired. Serve warm and enjoy!
S’More Rice Krispies Treats – Rice Krispies With Marshmallow And Chocolate Drizzle
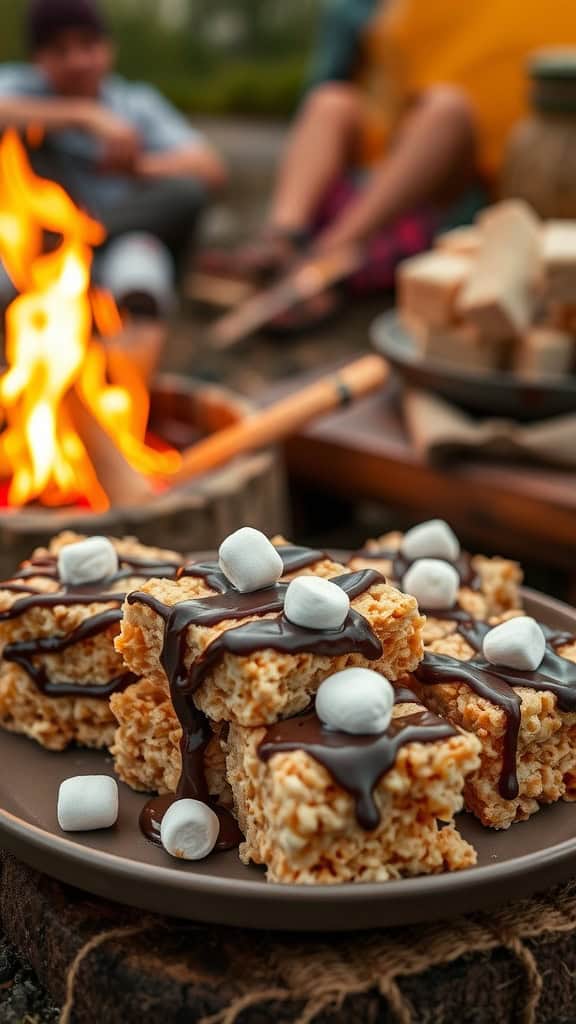
If you love the classic campfire treat, you’ll adore these S’More Rice Krispies Treats. They bring together crispy rice cereal, gooey marshmallows, and a drizzle of chocolate for a delightful twist on the traditional s’mores. These treats are not only delicious but also super easy to whip up, making them a perfect addition to your camping-themed party.
The combination of textures and flavors is sure to satisfy your sweet tooth. The crispy rice creates a light base, while the melted marshmallows add a chewy element. Topped with chocolate drizzle and mini marshmallows, these treats are as fun to make as they are to eat!
Ingredients
- 4 cups Rice Krispies cereal
- 3 tablespoons unsalted butter
- 1 package (10 oz) mini marshmallows
- 1/2 cup chocolate chips
- 1/4 cup mini marshmallows for topping
Instructions
- Prepare the Pan: Grease a 9×13 inch baking dish with cooking spray or butter.
- Melt the Butter: In a large saucepan, melt the butter over low heat. Add the mini marshmallows, stirring until completely melted and smooth.
- Combine with Cereal: Remove from heat and add the Rice Krispies cereal, mixing well until all the cereal is coated.
- Press into Dish: Pour the mixture into the prepared baking dish and press down evenly with a spatula.
- Make the Chocolate Drizzle: In a microwave-safe bowl, melt the chocolate chips in 30-second intervals, stirring until smooth. Drizzle over the cooled Rice Krispies.
- Add Toppings: Sprinkle the mini marshmallows on top of the chocolate drizzle. Let it set for about 30 minutes before cutting into squares.
Firewood Twists – Cinnamon Sugar Breadsticks Shaped Like Firewood
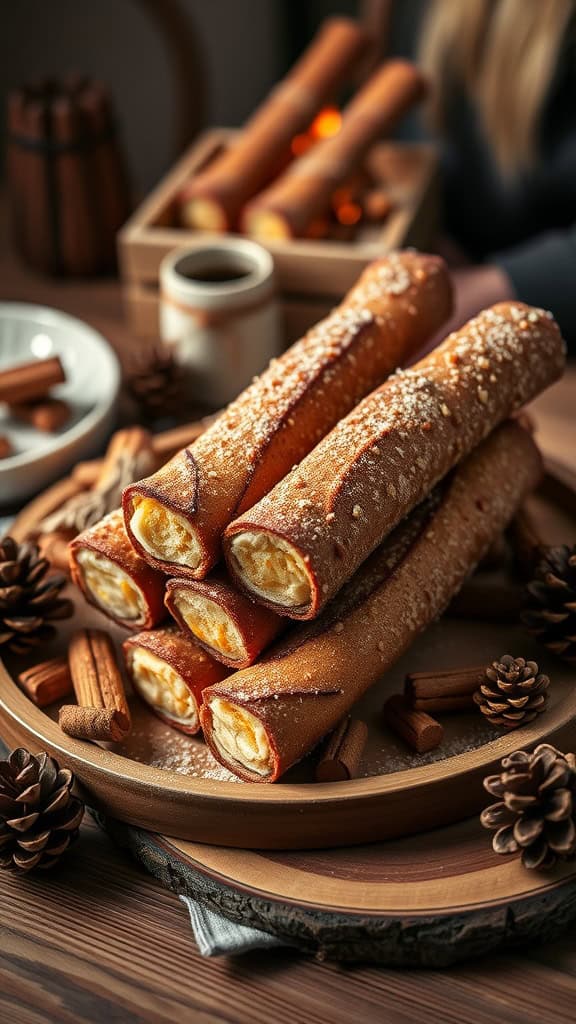
Firewood Twists are a delightful twist on classic breadsticks, designed to bring a touch of outdoor fun to your camping-themed party. These cinnamon sugar breadsticks resemble little logs, making them a playful addition to your table. With a soft, chewy texture and a sweet cinnamon coating, they are sure to please both kids and adults alike.
Not only are they easy to make, but they also fill your home with a comforting cinnamon aroma that will entice everyone to gather around. Serve them warm for the best experience, and watch how quickly they disappear!
Ingredients
- 1 cup warm water (110°F)
- 2 teaspoons active dry yeast
- 2 tablespoons granulated sugar
- 3 cups all-purpose flour
- 1 teaspoon salt
- 2 tablespoons olive oil
- 1/4 cup unsalted butter, melted
- 1/2 cup sugar (for coating)
- 1 tablespoon ground cinnamon
- Flour for dusting
Instructions
- Mix the Dough: In a large bowl, combine warm water, yeast, and sugar. Let it sit for about 5 minutes until bubbly. Add flour, salt, and olive oil, then mix until a dough forms.
- Knead: Turn the dough onto a floured surface and knead for 5-7 minutes until smooth. Place it in a greased bowl, cover, and let rise for about 1 hour until doubled in size.
- Shape the Twists: Preheat the oven to 375°F (190°C). Roll the dough into a rectangle and cut it into strips. Twist each strip to form a log-like shape, ensuring to pinch the ends to keep them secure.
- Coat with Cinnamon Sugar: In a small bowl, mix the sugar and cinnamon. Brush each twist with melted butter and roll in the cinnamon sugar mixture.
- Bake: Place the twists on a baking sheet lined with parchment paper and bake for 15-20 minutes until golden brown. Let them cool slightly before serving.
Wilderness Brownie Bites – Brownies Decorated Like Mini Tree Stumps

These Wilderness Brownie Bites are a fun and creative treat that perfectly captures the essence of the great outdoors. They combine the rich, fudgy flavor of brownies with whimsical decorations that make them look like mini tree stumps. Ideal for kids and adults alike, these bites are not only delicious but also simple to make, ensuring they can be whipped up quickly for your next camping-themed party.
The taste is a delightful mix of deep chocolate and earthy textures, topped with a chocolate frosting that adds both sweetness and a rustic appeal. Whether you’re enjoying them around a campfire or serving them at a backyard gathering, these brownie bites are sure to be a hit!
Ingredients
- 1 box of brownie mix (plus ingredients needed on the box)
- 1 cup chocolate frosting
- Green decorative icing or edible moss (for decoration)
- 1/4 cup crushed nuts (optional, for texture)
Instructions
- Prepare the Brownies: Follow the instructions on the brownie mix box to prepare the batter. Pour it into a greased mini muffin tin.
- Bake: Bake according to the package instructions, usually around 18-20 minutes. Allow them to cool completely in the tin.
- Decorate: Once cooled, carefully remove the brownies from the tin. Pipe or spread chocolate frosting on top to create a tree stump appearance.
- Add Finishing Touches: Use green icing or edible moss to mimic foliage on top of each brownie bite. If desired, sprinkle crushed nuts around the base for added texture.
- Serve: Place the finished brownie bites on a platter, and enjoy them at your camping-themed party!