

Throwing a party? Here are 25 easy party food ideas that are sure to satisfy every palate. From finger foods to dips, these crowd-pleasing bites will keep your guests happy and coming back for more. Whether you’re hosting a casual get-together or a festive celebration, there’s something here for everyone!
Savory Mini Pancake Stacks
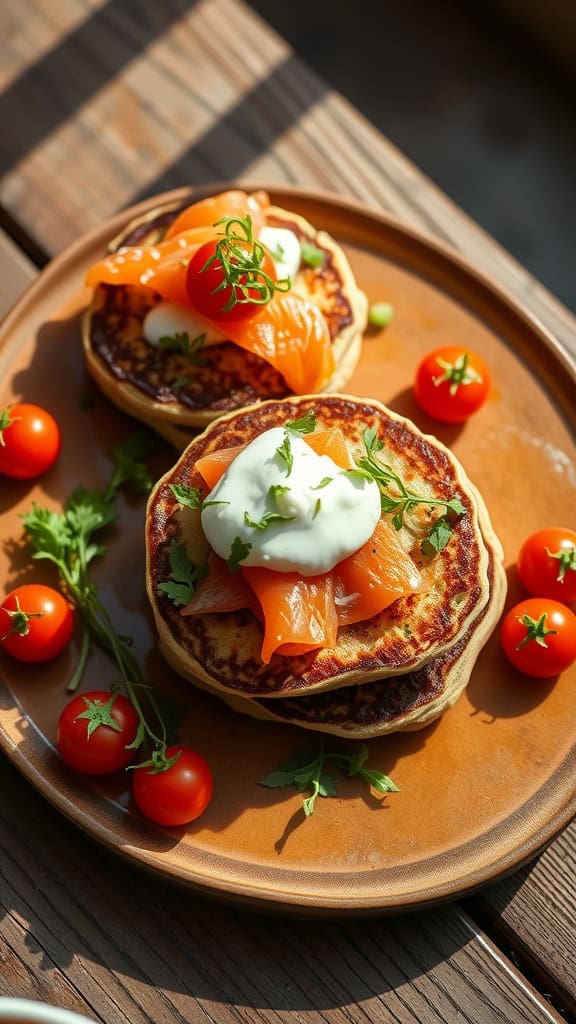
Savory mini pancake stacks are a delightful twist on traditional pancakes, perfect for party bites. These stacks combine fluffy pancakes with a variety of toppings, creating a dish that’s not only visually appealing but also packed with flavor. Light yet satisfying, they’re the kind of finger food that will impress your guests without requiring hours in the kitchen.
To prepare these stacks, simply whip up a basic pancake batter, cook the pancakes until golden, and layer them with toppings like smoked salmon, a dollop of sour cream, and fresh herbs. The result is a savory treat that pairs well with cocktails or can be served as a light appetizer. It’s a quick and easy recipe that’s sure to be a hit!
Ingredients
- 1 cup all-purpose flour
- 1 tablespoon baking powder
- 1/2 teaspoon salt
- 1 cup milk
- 1 large egg
- 2 tablespoons melted butter
- 4 ounces smoked salmon
- Sour cream for topping
- Fresh dill or chives for garnish
- Cherry tomatoes, halved, for serving
Instructions
- Make the Pancake Batter: In a mixing bowl, whisk together flour, baking powder, and salt. In another bowl, combine milk, egg, and melted butter. Pour the wet ingredients into the dry ingredients and mix until just combined.
- Cook the Pancakes: Heat a non-stick skillet over medium heat. Pour about 1/4 cup of batter for each pancake onto the skillet. Cook until bubbles form on the surface, then flip and cook until golden brown on both sides.
- Assemble the Stacks: Place one pancake on a serving plate, top with a slice of smoked salmon, a dollop of sour cream, and sprinkle with fresh herbs. Repeat with another pancake layer on top.
- Garnish and Serve: Add halved cherry tomatoes around the stacks for a pop of color. Serve immediately while warm.
Spicy Honey Garlic Chicken Bites

Spicy Honey Garlic Chicken Bites are a fantastic finger food that combines sweet and savory flavors in a bite-sized package. The chicken is tender, juicy, and coated in a sticky, spicy sauce that adds just the right amount of heat. Simple to prepare, these bites are perfect for parties and will keep your guests coming back for more.
With just a few ingredients, you can whip up this crowd-pleaser in no time. Serve them with toothpicks for easy snacking, and watch as they disappear from the platter. They pair wonderfully with different dips or can be enjoyed on their own!
Ingredients
- 1 pound chicken breast, cut into bite-sized pieces
- 1/4 cup honey
- 2 tablespoons soy sauce
- 1 tablespoon apple cider vinegar
- 3 cloves garlic, minced
- 1 teaspoon red pepper flakes (adjust to taste)
- Salt and pepper to taste
- 2 tablespoons vegetable oil
- Chopped green onions or cilantro for garnish
Instructions
- Marinate the Chicken: In a bowl, combine honey, soy sauce, apple cider vinegar, minced garlic, red pepper flakes, salt, and pepper. Add the chicken pieces and let them marinate for at least 30 minutes, preferably in the refrigerator.
- Cook the Chicken: Heat vegetable oil in a large skillet over medium heat. Remove the chicken from the marinade, letting excess sauce drip off. Cook the chicken in the skillet, turning occasionally, until golden brown and cooked through, about 8-10 minutes.
- Glaze the Chicken: Pour the remaining marinade into the skillet and bring to a simmer. Cook for another 2-3 minutes until the sauce thickens and coats the chicken.
- Garnish and Serve: Remove from heat, garnish with chopped green onions or cilantro, and serve immediately.
Cheesy Pull-Apart Bread With Dipping Sauce

Cheesy pull-apart bread is the ultimate party snack! This warm and gooey treat is perfect for sharing, with its soft bread pieces begging to be dipped into a flavorful sauce. It’s simple to prepare and sure to please a crowd, making it an ideal addition to any gathering.
Each bite is bursting with cheesy goodness, combined with the aroma of freshly baked bread. Paired with a zesty dipping sauce, this dish guarantees to be a hit. Whether you’re hosting a casual get-together or a more formal affair, cheesy pull-apart bread is a delightful option that everyone will love.
Ingredients
- 1 loaf of French bread
- 1 cup shredded mozzarella cheese
- 1/2 cup grated Parmesan cheese
- 1/4 cup unsalted butter, melted
- 2 cloves garlic, minced
- 1 tablespoon fresh parsley, chopped
- 1 teaspoon garlic powder
- 1/2 teaspoon salt
- 1/2 teaspoon black pepper
Instructions
- Preheat your oven to 350°F (175°C).
- Slice the French bread diagonally in both directions, creating a checkerboard pattern, without cutting all the way through.
- In a bowl, mix together the melted butter, minced garlic, parsley, garlic powder, salt, and pepper.
- Carefully spoon the cheese mixture into the cuts in the bread, ensuring the cheese is evenly distributed.
- Drizzle the remaining butter mixture over the top of the bread.
- Wrap the bread in aluminum foil and bake for 15 minutes. Then, unwrap and bake for an additional 10 minutes until the cheese is melted and the bread is golden brown.
- Serve warm with your favorite dipping sauce, like marinara or a creamy ranch dip.
Mini Caprese Skewers With Balsamic Drizzle
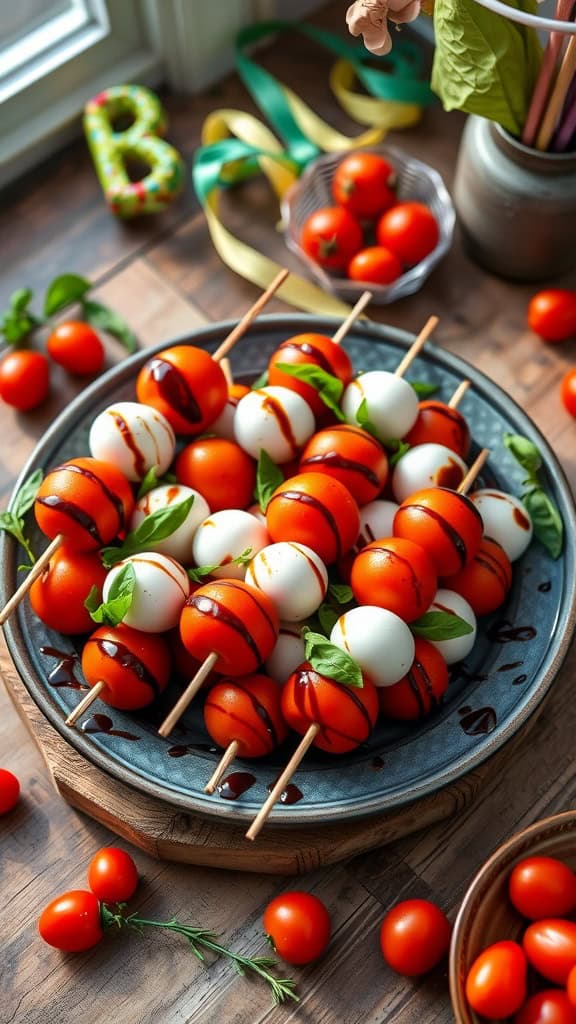
Mini Caprese skewers are a delightful and refreshing appetizer that combine the classic flavors of a Caprese salad in a convenient bite-sized format. These skewers feature juicy cherry tomatoes, creamy mozzarella balls, and fresh basil, all drizzled with a tangy balsamic reduction. They offer a perfect balance of flavor and are incredibly easy to make, making them a hit at any gathering.
These skewers not only taste great but look beautiful on any party platter. With their vibrant colors and fresh ingredients, they are sure to please both the eye and the palate.
Ingredients
- 1 pint cherry tomatoes
- 1 pound fresh mozzarella balls (bocconcini)
- Fresh basil leaves
- Balsamic glaze (store-bought or homemade)
- Salt and pepper to taste
- Wooden skewers
Instructions
- Assemble the Skewers: On each skewer, thread a cherry tomato, followed by a basil leaf, and then a mozzarella ball. Repeat this pattern until the skewer is filled, leaving some space at the end for easy handling.
- Season: Once all the skewers are assembled, sprinkle them lightly with salt and pepper to enhance the flavors.
- Drizzle: Just before serving, drizzle the skewers with balsamic glaze for a touch of sweetness and acidity.
- Serve: Arrange the skewers on a platter and enjoy as a fresh appetizer!
Crispy Loaded Potato Bites

Crispy Loaded Potato Bites are the ultimate party snack! These bite-sized wonders are packed with flavor and offer a delightful crunch that keeps guests coming back for more. With layers of cheesy goodness, crispy bacon, and a dollop of sour cream, they deliver a satisfying taste in every bite. Plus, they’re simple to whip up, making them perfect for any gathering.
These bites bring the classic comfort of loaded baked potatoes to a fun, finger-food format. Ideal for sharing, they are sure to please a crowd and can be easily customized with your favorite toppings. Get ready to impress your guests with this easy-to-make recipe!
Ingredients
- 2 cups shredded potatoes (frozen or fresh)
- 1 cup shredded cheddar cheese
- 1/2 cup cooked bacon, crumbled
- 1/4 cup sour cream
- 2 tablespoons chopped green onions
- Salt and pepper to taste
- Cooking spray
Instructions
- Preheat your oven to 400°F (200°C) and grease a mini muffin tin with cooking spray.
- In a bowl, combine shredded potatoes, half of the cheese, crumbled bacon, and season with salt and pepper.
- Press the potato mixture firmly into the muffin tin, creating small cups.
- Bake for 20-25 minutes or until the edges are golden brown and crispy.
- Remove from the oven and top each bite with the remaining cheese. Return to the oven for an additional 5 minutes to melt the cheese.
- Once out of the oven, let them cool slightly. Top with sour cream and sprinkle with green onions before serving.
Sweet & Salty Chocolate-Covered Pretzel Sticks

Sweet and salty chocolate-covered pretzel sticks are a delightful way to satisfy your cravings for both flavors. The combination of crunchy pretzels, rich chocolate, and a sprinkle of sea salt creates a snack that’s hard to resist. Best of all, they’re super easy to make, making them perfect for parties or casual get-togethers.
This treat is not only delicious but also fun to customize. You can dip them in milk, dark, or white chocolate and add toppings like sprinkles, crushed nuts, or drizzles of contrasting chocolate. They’re sure to please a crowd!
Ingredients
- 1 bag of pretzel sticks
- 2 cups chocolate chips (milk, dark, or white)
- 1 tablespoon coconut oil (optional, for smoother chocolate)
- Sea salt, for sprinkling
- Optional toppings: sprinkles, crushed nuts, or crushed candies
Instructions
- Prepare the Chocolate: In a microwave-safe bowl, combine the chocolate chips and coconut oil. Heat in 30-second intervals, stirring in between until fully melted and smooth.
- Dip the Pretzels: Hold a pretzel stick by one end and dip it into the melted chocolate, covering about two-thirds of the stick. Allow any excess chocolate to drip off.
- Add Toppings: Before the chocolate sets, sprinkle sea salt and any additional toppings you desire over the chocolate-covered part of the pretzel.
- Set to Dry: Place the dipped pretzel sticks on a baking sheet lined with parchment paper. Let them sit at room temperature until the chocolate is firm, or place them in the refrigerator for faster setting.
- Serve and Enjoy: Once the chocolate has hardened, your sweet and salty snacks are ready to enjoy! Arrange them on a platter for your guests.
Buffalo Cauliflower Poppers
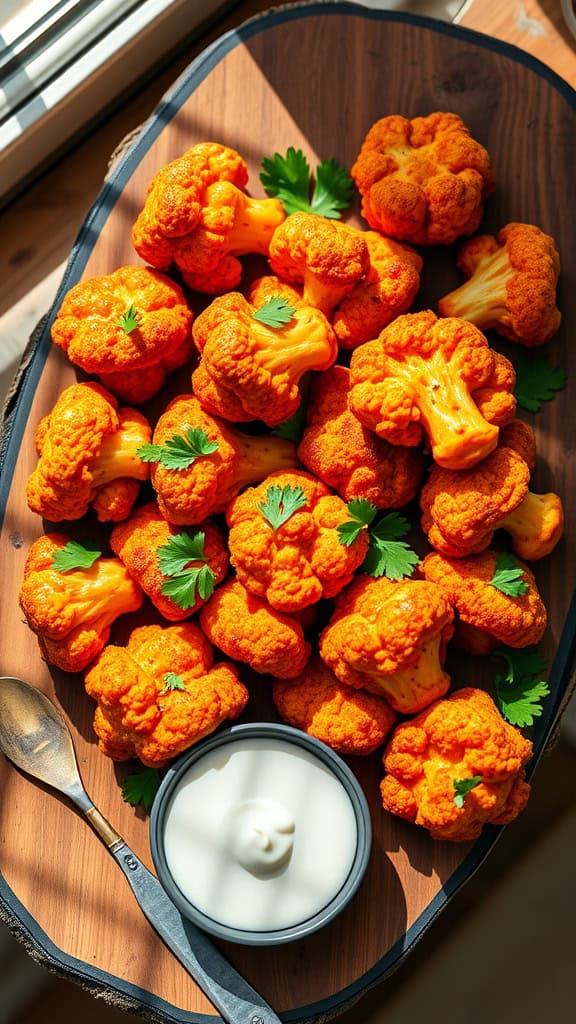
Buffalo Cauliflower Poppers are a tasty and healthier twist on the classic buffalo wings. These bite-sized treats are crispy, spicy, and bursting with flavor, making them perfect for any party or gathering. With a simple preparation process, they are great for both seasoned cooks and beginners.
These poppers are made by coating cauliflower florets in a spicy buffalo sauce and baking them until they’re golden brown and delicious. Pair them with a cooling ranch or blue cheese dip, and you’ll have a crowd-pleaser that everyone loves!
Ingredients
- 1 head of cauliflower, cut into florets
- 1 cup all-purpose flour
- 1 teaspoon garlic powder
- 1 teaspoon paprika
- 1/2 teaspoon salt
- 1 cup water
- 1 cup buffalo sauce
- 1 tablespoon olive oil
- Optional: chopped parsley for garnish
Instructions
- Preheat the oven to 450°F (232°C) and line a baking sheet with parchment paper.
- In a bowl, mix flour, garlic powder, paprika, salt, and water until smooth. Dip each cauliflower floret into the batter, coating well.
- Place the coated florets on the prepared baking sheet. Bake for 25-30 minutes until they are crispy and golden.
- In a separate bowl, combine the baked cauliflower with buffalo sauce and toss to coat evenly.
- Return the sauced cauliflower to the baking sheet and bake for an additional 10 minutes.
- Once done, remove from the oven, garnish with chopped parsley if desired, and serve with your favorite dip.
Bite-Sized Taco Cups

Bite-sized taco cups are a fun and tasty addition to any party spread. These mini tacos pack all the classic flavors of a traditional taco into a convenient, handheld form. With a crispy shell and customizable toppings, they are sure to be a hit among guests of all ages.
Making these taco cups is simple and can be done in just a few steps. You can easily tailor the ingredients to suit your taste, whether you prefer beef, chicken, or a vegetarian option. They’re perfect for gatherings, allowing everyone to enjoy their own little taco without the mess!
Ingredients
- 12 small corn tortillas
- 1 pound ground beef (or your choice of protein)
- 1 packet taco seasoning
- 1 cup diced tomatoes
- 1 cup shredded lettuce
- 1/2 cup shredded cheese
- 1/4 cup chopped cilantro
- 1/2 cup diced bell peppers
- Sour cream (optional)
- Salsa (optional)
Instructions
- Preheat your oven to 375°F (190°C).
- In a skillet, cook the ground beef until browned. Drain any excess fat and stir in the taco seasoning. Follow the instructions on the seasoning packet for the best results.
- While the beef is cooking, take the corn tortillas and gently mold them into muffin tins to create small cups. You may want to lightly spray the tin with cooking spray to prevent sticking.
- Fill each tortilla cup with a spoonful of the seasoned meat.
- Bake in the oven for about 10-12 minutes, or until the edges of the tortillas are crispy.
- Once baked, remove the taco cups from the oven and let them cool slightly. Then top each with diced tomatoes, shredded lettuce, cheese, bell peppers, and cilantro.
- Serve warm with sour cream and salsa on the side for dipping!
Mini Mac & Cheese Muffins

Mini Mac & Cheese Muffins are the ultimate party treat that combines the comfort of classic mac and cheese with the fun of bite-sized portions. These little gems are creamy, cheesy, and packed with flavor, making them a hit with both kids and adults. They’re easy to prepare, and you can even make them ahead of time!
Perfect for gatherings, these muffins are not only visually appealing but also deliciously satisfying. Serve them warm for the best gooey cheese experience, and watch them disappear in no time. Here’s how to whip up a batch!
Ingredients
- 2 cups elbow macaroni
- 2 cups sharp cheddar cheese, shredded
- 1 cup milk
- 1/2 cup sour cream
- 1 large egg
- 1/4 cup butter, melted
- 1 teaspoon garlic powder
- 1 teaspoon onion powder
- Salt and pepper to taste
- Optional: breadcrumbs for topping
Instructions
- Preheat the oven to 350°F (175°C) and grease a muffin tin.
- Cook the macaroni according to package instructions, drain, and set aside.
- In a large mixing bowl, combine the cooked macaroni, cheddar cheese, milk, sour cream, egg, melted butter, garlic powder, onion powder, salt, and pepper. Stir well until fully combined.
- Scoop the mixture into the prepared muffin tin, filling each cup about 3/4 full. If desired, sprinkle breadcrumbs on top for added crunch.
- Bake for 20-25 minutes, or until the tops are golden and the cheese is bubbly.
- Let cool for a few minutes before removing from the muffin tin. Serve warm and enjoy!
Teriyaki Meatball Skewers
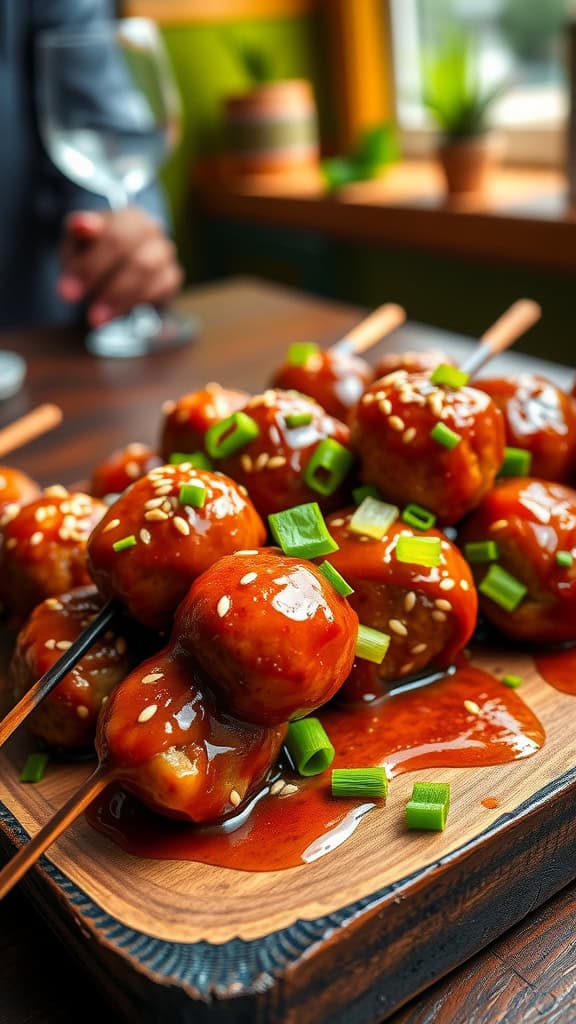
Teriyaki meatball skewers are a delightful blend of sweet and savory flavors that are sure to impress your guests. These bite-sized treats are juicy, tender meatballs coated in a rich teriyaki glaze, making them a crowd favorite at any gathering.
Not only do they taste amazing, but they are also super easy to prepare. With just a few simple ingredients, you can whip these up in no time, making them a perfect choice for parties or game day snacks.
Ingredients
- 1 pound ground meat (beef, pork, or chicken)
- 1/2 cup breadcrumbs
- 1/4 cup green onions, chopped
- 1 egg
- 1 teaspoon garlic powder
- 1 teaspoon ginger, grated
- 1/4 cup teriyaki sauce (plus extra for glazing)
- Salt and pepper to taste
- Sesame seeds for garnish
- Skewers (soaked in water if wooden)
Instructions
- Preheat your oven to 400°F (200°C).
- In a large bowl, mix the ground meat, breadcrumbs, chopped green onions, egg, garlic powder, ginger, teriyaki sauce, salt, and pepper until well combined.
- Form the mixture into small meatballs, about 1 inch in diameter.
- Thread the meatballs onto the skewers, leaving a bit of space between each one.
- Place the skewers on a baking sheet lined with parchment paper and bake for 20-25 minutes until cooked through.
- During the last few minutes of baking, brush the meatballs with extra teriyaki sauce for extra flavor.
- Remove from the oven and sprinkle with sesame seeds before serving.
Crunchy Ranch-Flavored Roasted Chickpeas

Crunchy ranch-flavored roasted chickpeas are a fantastic party snack that brings a delightful crunch to your gatherings. They are seasoned with a zesty ranch flavor, making them a tasty alternative to traditional chips and unhealthy snacks. Plus, they are super easy to make, requiring just a handful of ingredients and minimal prep time.
These roasted chickpeas are not only addictive but also packed with protein and fiber, making them a guilt-free option that everyone will love. Serve them in bowls for your guests to munch on or use them as a topping for salads and soups. They’re sure to be a hit at any party!
Ingredients
- 1 can (15 oz) chickpeas, drained and rinsed
- 2 tablespoons olive oil
- 1 tablespoon ranch seasoning mix
- 1/2 teaspoon garlic powder
- 1/2 teaspoon onion powder
- 1/4 teaspoon salt
- 1/4 teaspoon black pepper
Instructions
- Preheat your oven to 400°F (200°C) and line a baking sheet with parchment paper.
- Spread the rinsed chickpeas on a clean kitchen towel and pat them dry. Remove any loose skins.
- In a bowl, toss the chickpeas with olive oil, ranch seasoning, garlic powder, onion powder, salt, and pepper until well coated.
- Spread the seasoned chickpeas in a single layer on the prepared baking sheet.
- Bake for 25-30 minutes, stirring halfway through, until golden brown and crispy.
- Let them cool slightly before serving. Enjoy your crunchy ranch-flavored roasted chickpeas!
Smoked Salmon & Cream Cheese Cucumber Rounds
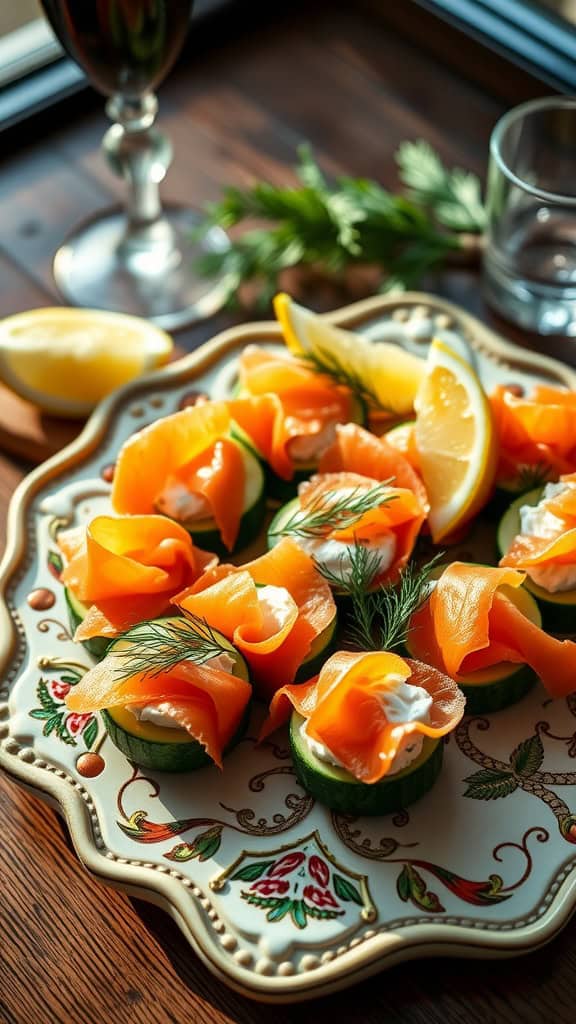
Smoked salmon and cream cheese cucumber rounds are a refreshing and elegant appetizer that’s perfect for any party. With their vibrant colors and light flavors, they offer a delightful balance of creamy and savory elements, all nestled on crisp cucumber slices. Plus, they’re incredibly easy to assemble, making them a stress-free choice for your next gathering.
This dish is not only visually appealing but also packed with taste. The cool crunch of the cucumber pairs beautifully with the rich cream cheese and the smoky notes of the salmon. Each bite is a burst of flavor that your guests will love, and they can be prepared in just a few minutes!
Ingredients
- 1 large cucumber
- 8 ounces cream cheese, softened
- 8 ounces smoked salmon
- 1 tablespoon fresh dill, chopped
- 1 teaspoon lemon juice
- Salt and pepper to taste
- Lemon wedges for garnish
Instructions
- Slice the cucumber into thick rounds, about 1/2 inch each.
- In a bowl, mix the softened cream cheese with lemon juice, dill, salt, and pepper until well combined.
- Spread a generous amount of the cream cheese mixture onto each cucumber slice.
- Top with a slice of smoked salmon, arranging it nicely.
- Garnish with additional dill and serve with lemon wedges on the side.
Mini Grilled Cheese And Tomato Soup Shooters

Mini grilled cheese and tomato soup shooters are the perfect party treat that combines two comforting classics into one delightful bite. The warm, gooey cheese paired with crispy bread creates a satisfying texture that complements the rich, savory tomato soup. This recipe is simple to whip up, making it a great option for any gathering.
Not only do these shooters look adorable on any table, but they also promise to please a crowd with their familiar flavors. Guests can easily dip the mini sandwiches into the tasty tomato soup, making for an interactive and fun dining experience.
Ingredients
- 8 slices of bread (your choice)
- 4 slices of cheese (cheddar or your favorite)
- 4 tablespoons butter
- 2 cups canned tomato soup
- Fresh herbs for garnish (optional)
Instructions
- Prepare the Grilled Cheese: Butter one side of each slice of bread. Place cheese between two slices, buttered sides out. Heat a skillet over medium heat and grill sandwiches until golden brown on both sides and cheese is melted, about 3-4 minutes per side.
- Cut the Sandwiches: Once grilled, remove from heat and let cool slightly. Cut each sandwich into quarters for easy dipping.
- Heat the Soup: In a saucepan, heat the tomato soup over medium heat until warm. Once hot, pour the soup into small shot glasses or cups.
- Assemble the Dish: Place a quarter of the grilled cheese on top of each soup shooter, securing them with a toothpick if desired. Garnish with fresh herbs for a pop of color.
- Serve: Arrange the shooters on a platter and enjoy this delicious combo with friends and family!
Garlic Butter Shrimp Cocktail Skewers
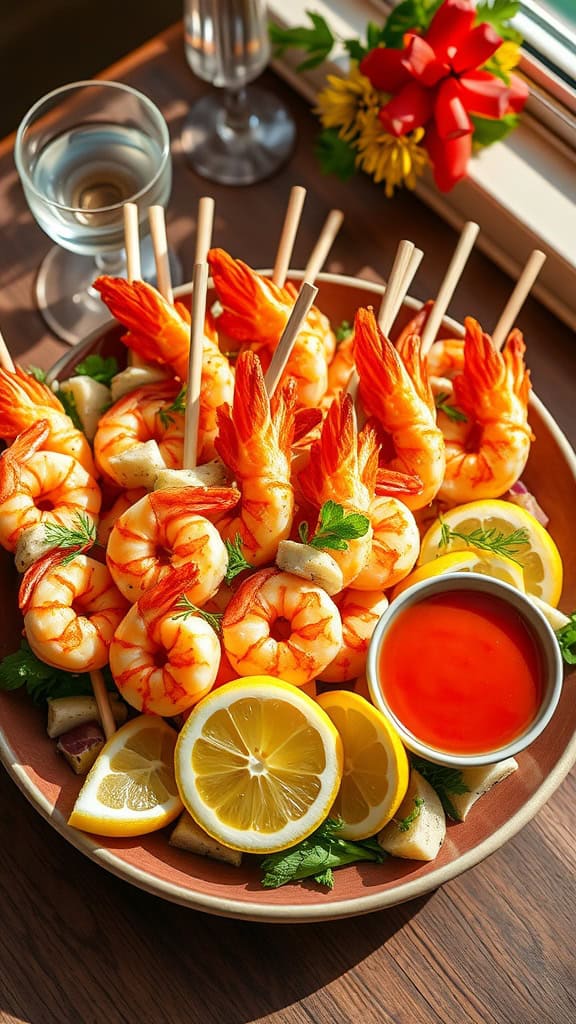
Garlic butter shrimp cocktail skewers are a delightful and simple treat that brings a burst of flavor to any gathering. These skewers are not just visually appealing; they are packed with rich, garlicky goodness. The combination of tender shrimp and buttery garlic creates a mouthwatering bite that’s sure to be a hit at your next party.
What makes these skewers even better is how easy they are to prepare. Perfect for casual get-togethers or elegant occasions alike, they can be served warm or cold, making them incredibly versatile. Pair them with a zesty dipping sauce for an extra kick!
Ingredients
- 1 pound large shrimp, peeled and deveined
- 1/2 cup unsalted butter
- 4 cloves garlic, minced
- 1 tablespoon lemon juice
- Salt and pepper to taste
- 1 teaspoon paprika
- Fresh parsley, chopped (for garnish)
- Wooden skewers (soaked in water for 30 minutes)
Instructions
- Prepare the Shrimp: In a bowl, combine the shrimp, melted butter, minced garlic, lemon juice, salt, pepper, and paprika. Toss well to coat the shrimp evenly.
- Skewer the Shrimp: Thread the shrimp onto the soaked wooden skewers, about 4-5 shrimp per skewer.
- Cook the Skewers: Preheat a grill or grill pan over medium heat. Cook the skewers for 2-3 minutes on each side until shrimp are pink and opaque.
- Garnish and Serve: Remove from the grill, sprinkle with fresh parsley, and serve with your favorite dipping sauce.
Diy Gourmet Popcorn Bar
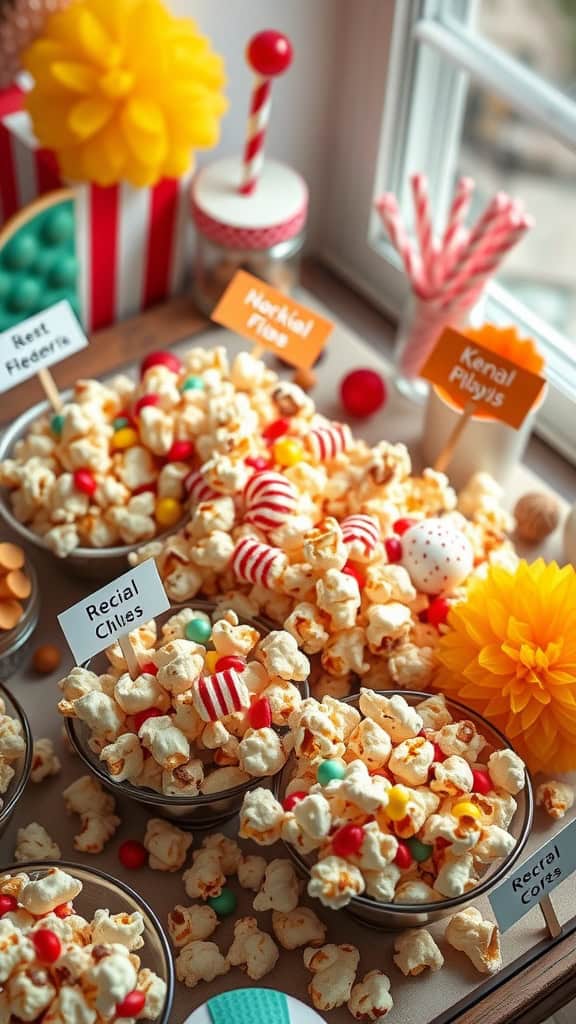
A DIY Gourmet Popcorn Bar is a fun and interactive way to add a unique touch to your party. It allows your guests to customize their popcorn creations with various toppings, flavors, and mix-ins, making it a delightful treat for every palate.
Creating this popcorn bar is incredibly simple. Start with freshly popped popcorn, and set out a variety of toppings like chocolate drizzles, candies, spices, and cheese powders. Guests can have fun mixing and matching flavors to create their perfect popcorn blend.
Ingredients
- 1 cup popcorn kernels
- 2 tablespoons vegetable oil
- 1/4 cup melted chocolate (milk, dark, or white)
- 1/2 cup assorted candies (M&Ms, gummy bears, etc.)
- 1/4 cup grated parmesan cheese
- 1 teaspoon garlic powder
- 1 teaspoon chili powder
- 1/4 cup kettle corn seasoning
- Assorted sprinkles
- Large bowls or bags for serving
Instructions
- Pop the Corn: In a large pot, heat the vegetable oil over medium heat. Add a few kernels to test the oil. Once they pop, add the remaining kernels, cover, and shake occasionally until popping slows down.
- Prepare the Toppings: While the popcorn is popping, prepare your toppings. Melt the chocolate in the microwave, and set out your candies and seasonings in small bowls.
- Mix and Match: Once the popcorn is ready, transfer it to a large bowl. Allow guests to drizzle with chocolate, sprinkle with seasonings, and add their favorite candies.
- Serve: Provide bags or bowls for guests to fill with their customized popcorn. Enjoy the delicious creations!
Baked Zucchini Fries With Spicy Aioli
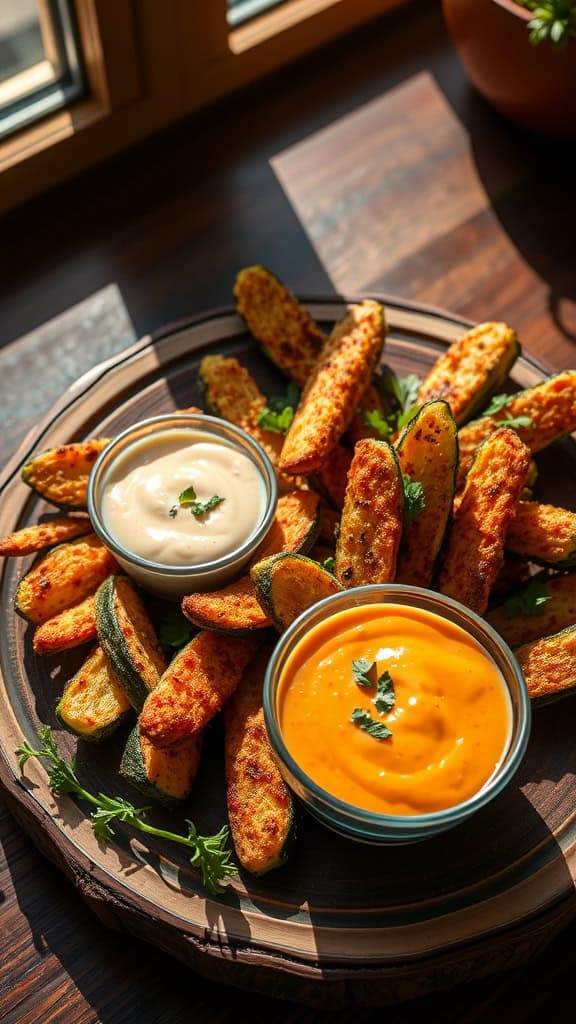
Baked zucchini fries are a fantastic party snack that’s both healthy and delicious. These crispy bites offer a satisfying crunch and a slightly sweet flavor that pairs perfectly with a variety of dipping sauces. They’re easy to prepare, making them a great addition to any gathering.
The best part about these fries is that they’re baked, not fried, so you can enjoy them without the extra guilt. Serve them with a zesty spicy aioli for an extra kick, and watch your guests come back for more!
Ingredients
- 3 medium zucchinis, sliced into fry shapes
- 1 cup breadcrumbs
- 1/2 cup grated Parmesan cheese
- 2 large eggs
- 1 teaspoon garlic powder
- 1 teaspoon paprika
- Salt and pepper to taste
- Oil spray
Instructions
- Preheat the oven to 425°F (220°C). Line a baking sheet with parchment paper.
- In a bowl, mix breadcrumbs, Parmesan cheese, garlic powder, paprika, salt, and pepper.
- In another bowl, whisk the eggs until well beaten.
- Dip each zucchini fry first into the egg, then into the breadcrumb mixture, ensuring they are coated evenly.
- Place the coated fries on the prepared baking sheet. Lightly spray with oil.
- Bake for 20-25 minutes, flipping halfway, until golden brown and crispy.
- Meanwhile, prepare the spicy aioli by mixing 1/2 cup mayonnaise, 1 tablespoon sriracha, and a pinch of garlic powder in a small bowl.
- Serve the baked zucchini fries hot with the spicy aioli on the side.
Honey Bbq Chicken Sliders
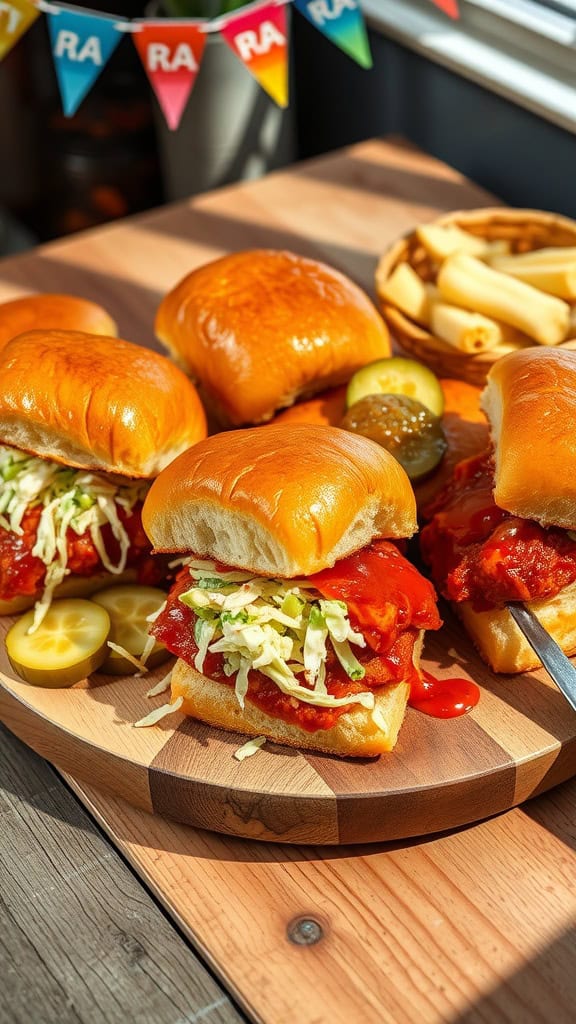
Honey BBQ chicken sliders offer a delightful blend of sweet and savory flavors, making them a hit at any gathering. These portable bites are simple to prepare, which is perfect for when you’re entertaining guests or just craving something tasty.
The tender chicken, coated in a rich honey BBQ sauce, pairs perfectly with crisp lettuce and soft, buttery rolls. Serve them up with your favorite sides, and watch as they disappear!
Ingredients
- 2 cups cooked chicken, shredded
- 1 cup honey BBQ sauce
- 12 slider buns
- 1 cup coleslaw mix
- Pickles, for garnish
Instructions
- Mix the shredded chicken with honey BBQ sauce in a bowl until well-coated.
- Slice the slider buns in half and lightly toast them if desired.
- Assemble the sliders: place a generous spoonful of the BBQ chicken on the bottom half of each bun.
- Add a small handful of coleslaw on top of the chicken.
- Top with the other half of the bun and add pickles if desired. Serve immediately and enjoy!
Pineapple & Prosciutto Bites
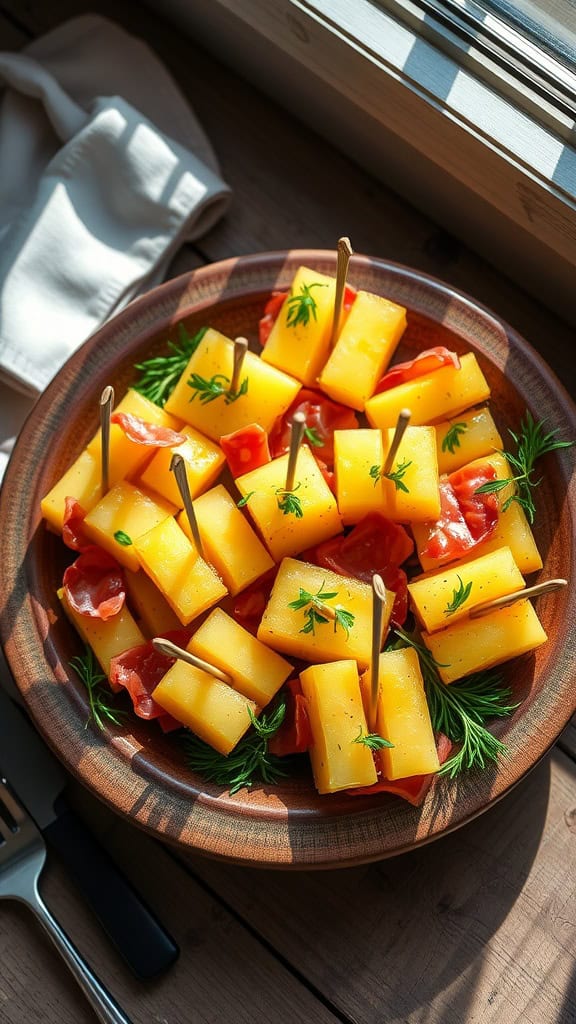
Pineapple and prosciutto bites are a delightful blend of sweet and savory flavors that make for a perfect party snack. The juicy pineapple pairs beautifully with the salty notes of prosciutto, creating a refreshing bite that’s sure to impress your guests.
These bites are incredibly simple to prepare, requiring minimal ingredients and time. Just a quick assembly, and you’ll have a crowd-pleasing appetizer that’s as appealing to the eye as it is to the palate.
Ingredients
- 1 fresh pineapple, peeled and cut into bite-sized cubes
- 8 ounces prosciutto, sliced
- Fresh herbs for garnish (like mint or basil)
- Skewers or toothpicks
Instructions
- Prepare the Pineapple: Cut the pineapple into bite-sized cubes and set aside.
- Wrap the Prosciutto: Take a slice of prosciutto and wrap it around each pineapple cube. If desired, secure with a skewer or toothpick.
- Garnish: Place the wrapped bites on a serving platter and garnish with fresh herbs.
- Serve: Enjoy these delicious bites fresh or chill them in the refrigerator for about 30 minutes before serving.
Caramelized Onion & Brie Puff Pastry Bites

If you’re looking for a bite-sized treat that combines a rich, creamy flavor with a touch of sweetness, these caramelized onion and brie puff pastry bites are a perfect choice. The combination of sweet, golden onions and melty brie encased in flaky pastry makes for a delightful appetizer that’s sure to impress your guests.
These bites are not only scrumptious but also easy to whip up, making them an ideal addition to any party spread. They offer a perfect balance of flavors and textures, making them a crowd favorite.
Ingredients
- 1 sheet puff pastry, thawed
- 2 large onions, thinly sliced
- 2 tablespoons olive oil
- 1 tablespoon balsamic vinegar
- 8 ounces brie cheese, sliced
- Salt and pepper to taste
- Fresh thyme, for garnish
Instructions
- Preheat Oven: Preheat your oven to 400°F (200°C).
- Caramelize Onions: In a skillet, heat olive oil over medium heat. Add the sliced onions, seasoning with salt and pepper. Cook for about 15-20 minutes, stirring frequently, until onions are soft and golden brown. Stir in balsamic vinegar and cook for an additional 2 minutes.
- Prepare Puff Pastry: Roll out the puff pastry sheet on a floured surface. Cut into squares or circles, depending on your preference.
- Assemble Bites: Place the pastry pieces on a baking sheet lined with parchment paper. Top each piece with a slice of brie and a spoonful of the caramelized onions.
- Bake: Bake in the preheated oven for about 15-20 minutes, or until the pastry is golden brown and puffed.
- Garnish and Serve: Remove from the oven and let cool slightly. Garnish with fresh thyme before serving.
Chocolate-Dipped Strawberry Towers

Chocolate-dipped strawberry towers are an impressive yet simple treat that combines the rich, sweet taste of chocolate with the fresh juiciness of strawberries. This recipe is not only easy to prepare but also adds a touch of elegance to any gathering, making it perfect for parties or special occasions.
Each bite is a delightful blend of creamy chocolate and ripe strawberry, creating a delightful contrast that will surely please your guests. Plus, they look stunning on any dessert table, making them a showstopper without requiring much effort!
Ingredients
- 2 cups fresh strawberries, washed and dried
- 1 cup semisweet chocolate chips
- 1/2 cup white chocolate chips (for drizzling)
- 1 tablespoon coconut oil (optional, for smooth melting)
- Wooden skewers or toothpicks
Instructions
- Prepare the Strawberries: Ensure the strawberries are completely dry after washing. Any moisture can prevent the chocolate from adhering properly.
- Melt the Chocolate: In a microwave-safe bowl, combine the semisweet chocolate chips and coconut oil (if using). Heat in 30-second intervals, stirring in between until melted and smooth.
- Dip the Strawberries: Hold each strawberry by the stem and dip it into the melted chocolate, covering about two-thirds of the berry. Allow excess chocolate to drip off and place it on a parchment-lined baking sheet.
- Drizzle White Chocolate: Melt the white chocolate in a similar fashion and use a fork or piping bag to drizzle it over the dipped strawberries for a decorative touch.
- Chill and Serve: Refrigerate the chocolate-covered strawberries for about 30 minutes, or until the chocolate is set. Serve them on a cake stand or platter for a beautiful presentation.
Mini Cheesecake Bites With Fruit Toppings

These mini cheesecake bites are a delightful treat that everyone will love. They’re sweet, creamy, and have the perfect balance of richness from the cheesecake and freshness from the fruit. Plus, they are super easy to make, making them ideal for parties or gatherings.
The best part is that you can customize these bites with your favorite fruits. Whether you prefer strawberries, blueberries, or even tropical options like kiwi, each topping adds a burst of flavor and color. Serve them up for any occasion, and watch them disappear!
Ingredients
- 1 cup graham cracker crumbs
- 1/4 cup granulated sugar
- 1/2 cup unsalted butter, melted
- 8 oz cream cheese, softened
- 1/2 cup powdered sugar
- 1 teaspoon vanilla extract
- 1 cup heavy whipping cream
- Fresh fruit for topping (e.g., strawberries, blueberries, kiwi)
- Mint leaves for garnish (optional)
Instructions
- Make the Crust: In a bowl, mix graham cracker crumbs, granulated sugar, and melted butter until combined. Press the mixture firmly into the bottoms of mini muffin tins to form crusts.
- Prepare the Cheesecake Filling: In a mixing bowl, beat together the softened cream cheese, powdered sugar, and vanilla until smooth. In another bowl, whip the heavy cream until stiff peaks form, then gently fold it into the cream cheese mixture.
- Fill the Tins: Spoon or pipe the cheesecake filling into the crusts, filling them to the top.
- Chill: Refrigerate the cheesecake bites for at least 2 hours, or until set.
- Add Toppings: Before serving, top each mini cheesecake with fresh fruit and a mint leaf for garnish if desired. Enjoy!
Crispy Air-Fried Pickles With Ranch Dip

These crispy air-fried pickles are the perfect snack for any gathering. They’re tangy, crunchy, and have just the right amount of seasoning to keep everyone coming back for more. Easy to whip up, they offer a delightful twist to the classic fried pickle without the extra oil.
Pair them with a creamy ranch dip, and you’ve got a crowd-pleaser that everyone will enjoy. They’re great for parties or as a fun appetizer at home. Get ready for some serious flavor with minimal fuss!
Ingredients
- 1 jar dill pickles
- 1 cup breadcrumbs
- 1/2 cup all-purpose flour
- 2 large eggs
- 1 teaspoon garlic powder
- 1 teaspoon paprika
- Salt and pepper to taste
- Cooking spray
- 1 cup ranch dressing (for dipping)
Instructions
- Prepare the Pickles: Drain the pickles and pat them dry with paper towels.
- Set Up Breading Station: In one bowl, place the flour. In another bowl, beat the eggs. In a third bowl, combine breadcrumbs, garlic powder, paprika, salt, and pepper.
- Bread the Pickles: Dip each pickle in the flour, then the egg, and finally coat with the breadcrumb mixture.
- Air-Fry the Pickles: Place the breaded pickles in the air fryer basket in a single layer. Spray lightly with cooking spray. Air fry at 375°F (190°C) for 8-10 minutes, or until golden brown and crispy.
- Serve: Remove from the air fryer and serve hot with ranch dip on the side.
Savory Herb & Cheese Puff Pastry Twists
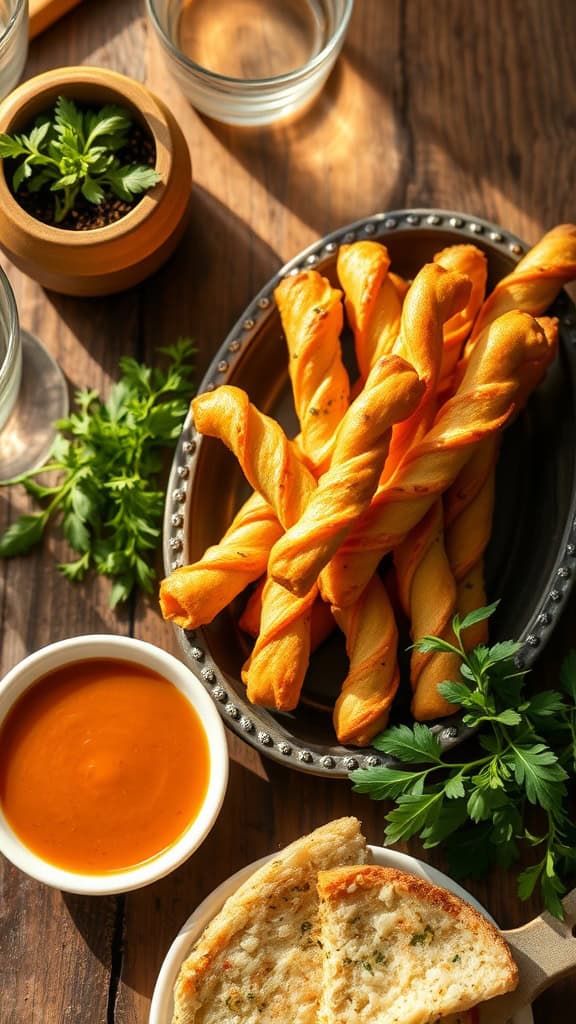
These Savory Herb & Cheese Puff Pastry Twists are the perfect party snack, combining flaky pastry with rich cheese and aromatic herbs for a bite that’s simply irresistible. They’re easy to whip up and are sure to impress guests with their delightful taste and crunchy texture.
The recipe is quick and straightforward, making it ideal for both novice cooks and seasoned chefs alike. Serve them warm alongside your favorite dipping sauce for an extra burst of flavor!
Ingredients
- 1 sheet of puff pastry, thawed
- 1 cup shredded cheese (cheddar, mozzarella, or your favorite)
- 1 tablespoon fresh herbs (like rosemary or thyme), chopped
- 1 egg, beaten (for egg wash)
- Salt and pepper to taste
- Dipping sauce (optional)
Instructions
- Preheat your oven to 400°F (200°C) and line a baking sheet with parchment paper.
- Roll out the puff pastry on a floured surface to smooth it out. Cut it into strips (about 1 inch wide).
- Sprinkle cheese and herbs evenly over half of each strip. Fold the other half over and press to seal.
- Twist each strip a few times and lay them on the prepared baking sheet.
- Brush each twist with beaten egg and sprinkle with salt and pepper.
- Bake for 15-20 minutes or until golden brown. Serve warm with your favorite dipping sauce.
Mediterranean Hummus And Pita Cup Samplers
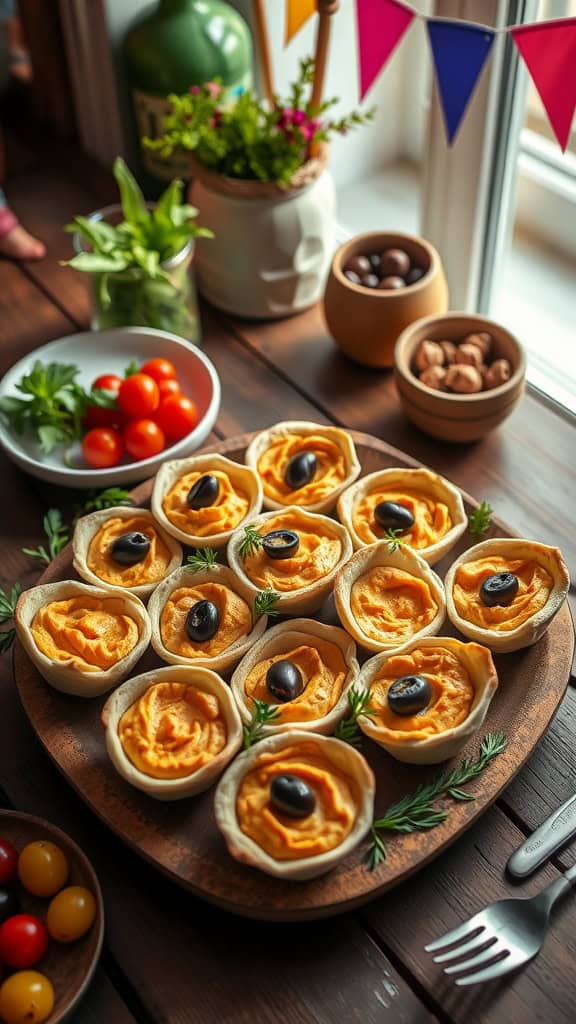
These Mediterranean Hummus and Pita Cup Samplers are a delightful way to enjoy a taste of the Mediterranean in bite-sized portions. Perfect for parties, they combine the creamy texture of hummus with the crunchy goodness of pita cups. Each bite is a refreshing mix of flavors, making them a favorite among guests.
Easy to prepare, these samplers are as fun to create as they are to eat. They can be customized with various toppings, such as olives, cherry tomatoes, or herbs, giving you the freedom to get creative. Serve them at your next gathering for a guaranteed crowd-pleaser!
Ingredients
- 1 cup hummus (store-bought or homemade)
- 12 small pita breads
- 1/4 cup olives, sliced
- 1/4 cup cherry tomatoes, halved
- Fresh parsley or cilantro, for garnish
- Olive oil, for drizzling
Instructions
- Preheat your oven to 350°F (175°C).
- Cut the pita breads into halves or quarters, depending on the size of your cups. Press them into a muffin tin to form little cups.
- Bake the pita cups for about 5-7 minutes until they are crispy and golden.
- Once cooled, fill each cup with a generous amount of hummus.
- Top with sliced olives, cherry tomatoes, and a sprinkle of fresh parsley or cilantro.
- Drizzle with a little olive oil before serving.
No-Bake Energy Ball Platter With Various Flavors

Energy balls are the perfect snack for any party! They combine nutrition with delightful flavors, making them a hit for guests of all ages. Easy to make and customizable, you can mix and match ingredients to create a platter that everyone’s sure to enjoy.
These no-bake treats are loaded with wholesome ingredients like oats, nut butter, and sweeteners. They’re chewy, satisfying, and can be made in a variety of flavors, from chocolate and peanut butter to coconut and fruit. Just roll, chill, and serve for a tasty addition to your gathering!
Ingredients
- 1 cup rolled oats
- 1/2 cup nut butter (peanut, almond, or cashew)
- 1/4 cup honey or maple syrup
- 1/2 cup mini chocolate chips or dried fruit
- 1/4 cup protein powder (optional)
- 1/4 cup shredded coconut (optional)
- 1 teaspoon vanilla extract
Instructions
- Mix Ingredients: In a large bowl, combine the rolled oats, nut butter, honey, chocolate chips (or dried fruit), protein powder, coconut, and vanilla extract. Stir until well combined.
- Form Balls: Using your hands, take small portions of the mixture and roll them into bite-sized balls, about 1 inch in diameter.
- Chill: Place the energy balls on a baking sheet lined with parchment paper. Refrigerate for at least 30 minutes to firm up.
- Serve: Once chilled, transfer the energy balls to a platter and serve. Enjoy your tasty, wholesome snacks!
