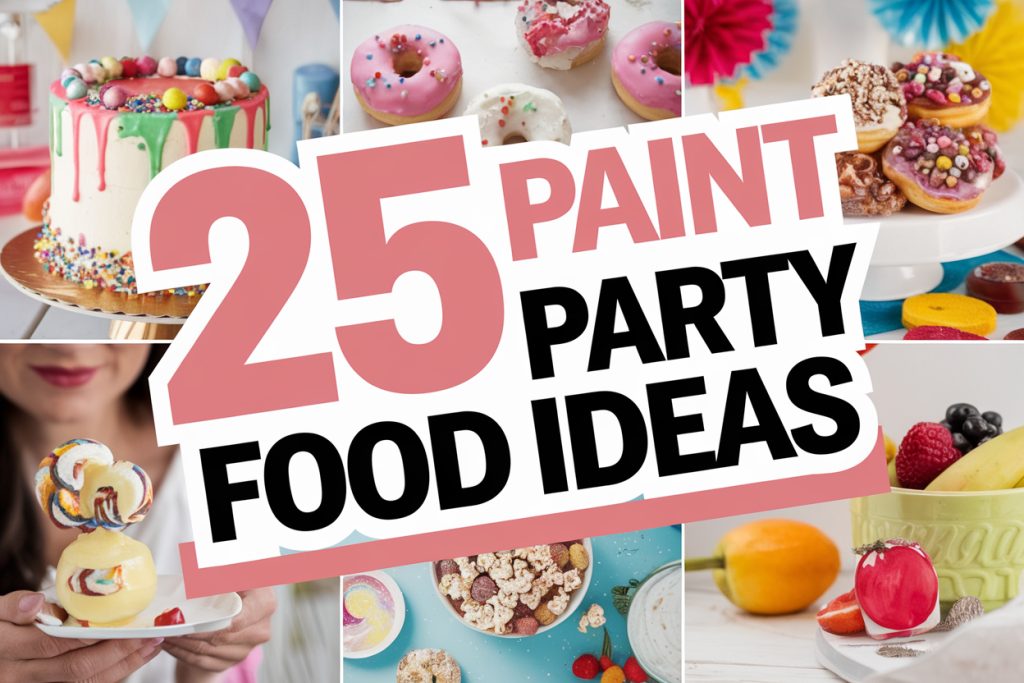
Paint Party Food Ideas
Here’s a quick little intro before diving in: Planning a paint party can be a blast—but what about the food? Nobody wants to spend half the evening in the kitchen while everyone else is having fun flinging paint (or carefully placing delicate brushstrokes, if that’s more your style).
Whether you’re hosting a kid-friendly event or a grown-ups-only get-together, creating edible “masterpieces” can really set the vibe. I’m talking about dishes so vibrant and playful, they look like they wandered straight off an artist’s canvas.
Below, you’ll find 25 imaginative ideas—each designed to keep your creative juices flowing and your guests happily munching.
Create a Fun Paint Party at Home
Turn your table into a little studio with ready to go kits, bulk canvases, brush sets, washable paints, aprons, and disposable table covers. Whether it is a birthday, youth night, small group, or family hangout, you can set up fast, keep the mess under control, and send everyone home with a colorful canvas they are proud of.
Shop Paint Party Supplies1. Colorful Canvas Caprese
- Fresh & Vibrant: Think sun-ripened tomatoes, silky mozzarella, and fresh basil leaves stacked in alternating layers. It’s the classic Caprese we all know and love, but let’s crank up the creativity.
- Artistic Arrangement: When assembling, arrange the slices in a swirl or any shape that calls to you—maybe a sunflower pattern or a bold spiral. Then, drizzle olive oil and balsamic glaze like you’re adding the finishing brushstrokes.
- Flavor Pop: If you want to go wild with color, toss in some heirloom tomato varieties—yellows, greens, and deeper reds. The extra hues will make your plate look like a painter’s color palette.
- Crowd Appeal: Caprese salads are universally loved. They’re fresh, light, and can easily fit into a spread of heavier bites. Plus, even the pickiest palates often cave to the combo of creamy cheese and juicy tomatoes.
- Pro Tip: Season with a sprinkle of flaky sea salt and freshly cracked pepper for that final, dramatic flourish. Trust me, it adds just enough zing to make the flavors sing!
2. Palette Pizzas
- Mini Masterpieces: Sometimes the best part of painting is getting to choose your own colors—and the same goes for pizza toppings! Opt for mini crusts (you can buy premade dough or use English muffins) so everyone gets their own “palette.”
- Colorful Toppings: Set out bowls of toppings—think bright peppers, olives, red onions, mushrooms, pepperoni, pineapple, and maybe even some goat cheese. The more colorful, the better.
- Interactive Fun: Encourage each guest to design their own mini pizza. They can arrange toppings in patterns, stripes, or random bursts of color. Kids love feeling like tiny Michelangelos, and adults get a kick out of it too.
- Easy Breezy Bake: Once everyone’s done making their pizza creation, pop them in the oven for a quick bake. It’s so easy that you won’t be tied to the kitchen all night.
- Cheese Variations: Sprinkle on a mix of mozzarella, cheddar, or even feta if you want to go fancy. It’ll melt into a swirl of gooey deliciousness—like paint blending on a canvas.
3. Edible Paintbrush Pops
- Sweet on a Stick: Homemade popsicles or cake pops are undeniably fun, but it’s the “paintbrush” twist that really steals the show. Imagine a slender handle—maybe a food-safe popsicle stick—dipped in colorful chocolate or candy melts.
- Popsicle Possibilities: For an icy treat, blend up fresh fruit puree or your favorite juice with yogurt. Then pour into molds and freeze. Once solid, drizzle different colors of melted chocolate across the top. Talk about edible art!
- Cake Pop Option: If you’d rather go the cake pop route, bake your favorite cake, crumble it, mix with frosting, and form into bite-size spheres. Dip them in candy melts, and swirl or drizzle more vibrant hues on top like playful brushstrokes.
- Perfect for All Ages: Both kids and adults light up at the sight of colorful sweets. And they’re the perfect grab-and-go treat—you won’t have to worry about plates or forks.
- Personalize It: Pick colors that match the theme of your paint party. Want pastel palette pops? Go for light pinks, blues, and yellows. Feeling bold? Opt for neon. Either way, these “paintbrushes” will inspire squeals of delight.
4. Abstract Art Hummus Dip
- Multiple Flavors: Who says hummus can’t be a piece of art? Grab a few tubs of different hummus flavors—roasted red pepper, classic, spinach-artichoke, or beet hummus for a real color pop.
- Swirl & Swish: Spread each flavor on a platter in overlapping circles or arcs. Use a butter knife to swirl them together—careful not to overmix, or you’ll lose the distinct colors.
- Vibrant Veggies: Serve with bright veggie dippers—think carrots, bell pepper strips, and sliced cucumbers. For added crunch, toss in baked pita chips. It’s like giving your guests a mini paintbrush they can use to scoop up the “abstract art.”
- Flavor Dimension: Adding a drizzle of olive oil, a sprinkle of paprika, or a dusting of za’atar can really make each dip area pop. It’s all about layers, color, and contrast—both visually and on the taste buds.
- Easier Than It Looks: The best part is, it’s practically zero effort. You’re just rearranging store-bought hummus (or if you’re a hummus hero, homemade) in a creative way. People will think you’ve slaved over a masterpiece when all you really did was swirl and dip.
5. Masterpiece Meatballs
- Going Gourmet: We’re not just talking about plain ol’ meatballs in a crockpot (though those are delicious in their own right). Elevate them with fun fillings or fancy sauces—cranberry glaze, teriyaki, or spicy marinara for that pop of color.
- Colorful Sauces: Line up the sauces in small dipping bowls like you’re presenting paint options. Garnish with fresh herbs or sprinkle on sesame seeds to give them that extra flair.
- Easy Handling: Spear each meatball with a decorative toothpick or mini skewer. This makes them super easy for guests to grab and appreciate—no messy forks and knives needed.
- Textural Contrast: Consider using different types of meat—beef, turkey, chicken, or even veggie-based—to offer variety. If you want extra pizzazz, top them with colorful bell pepper confetti or drizzle with bright aioli.
- Party Trick: Meatballs can be kept warm in a slow cooker during the party. No one wants to bite into a cold meatball, right? Just set the cooker to “keep warm,” and you’re golden. Trust me, guests will keep popping these bite-sized masterpieces all evening.
6. Artisan Cheese Board
- A Still-Life on a Platter: Imagine different cheese textures—soft brie, crumbly blue, sharp cheddar—arranged with fruit, nuts, and maybe a sprinkle of edible flowers. It’s like a Renaissance still-life painting you can actually eat.
- Layering Colors & Flavors: Think bright berries, green grapes, dried apricots, salted almonds, and honey drizzles. The mixture of sweet, salty, creamy, and crunchy is the key to a well-rounded board.
- Visual Feast: Use different shapes and heights—stack crackers vertically, fan out apple slices, or roll up charcuterie into “rose” shapes. The goal is to create movement and depth, just like in a painting.
- Guest-Friendly: Cheese boards are the ultimate snacking station. Everyone can graze, chat, and keep exploring the board for new flavor combos. No utensils needed besides maybe a cheese knife or two.
- Pro Tip: Label the cheeses if you like. Small, handwritten tags can double as adorable decorations. This also cuts down on the guesswork of “Is this cheese spicy or mild?” Because no one wants a surprise mouthful of intense blue cheese when they’re expecting mild gouda!
7. Impressionist Pasta Salad
- Burst of Color: Pasta salad is perfect for sneaking in all the colorful veggies you can find—cherry tomatoes, bell peppers, olives, red onions, and fresh herbs. It’s like throwing dots of paint onto a canvas.
- Flavorful Dressing: Whip up a light vinaigrette or a creamy Italian dressing. Consider adding lemon zest or fresh herbs to create bright, punchy flavors that complement the vegetables.
- Texture Play: Don’t hold back on crunchy bits like cucumbers or celery. Toss in some cubed mozzarella or feta for creaminess—because why not?
- Make It Ahead: The beauty of pasta salad is that it tastes even better after chilling for a few hours. This frees you up to focus on hosting instead of cooking mid-party.
- The Impressionist Touch: Let everything mingle in a large bowl, but don’t mix it too thoroughly—those specks of color should still pop. It might look haphazard, but that’s the charm. Like an impressionist painting, the effect is more about the overall vibe than meticulous precision.
8. Fresco Fruit Tartlets
- Tiny Canvases: Think bite-sized pastry shells filled with vanilla custard or pastry cream, topped with slices of kiwi, strawberries, peaches, or any fruit that catches your eye.
- Colorful Combinations: Arrange the fruit in a spiral or a mosaic pattern. The vibrant reds, greens, yellows, and blues (hello, blueberries!) create a sweet tapestry that guests will swoon over.
- Custard or Cream Cheese Base: You can keep it classic with a simple vanilla custard, or whip up a cream cheese filling sweetened with a bit of powdered sugar. Both provide that rich layer that pairs beautifully with the fresh fruit.
- Shine Bright: Want them to really glisten? Brush a little warmed apricot jam on top of the fruit. It adds a subtle sweetness and makes the colors pop like a newly polished fresco.
- Practical and Pretty: Tartlets are the perfect finger food—no plates or forks needed, minimal mess, and major aesthetic impact. They’re also a great sweet contrast if your table is heavy on savory snacks.
9. Watercolor Wraps
- Vibrant Fillings: Choose colorful ingredients—bright peppers, purple cabbage, juicy tomatoes, spinach, and maybe even edible flowers if you’re feeling bold. When you slice the wraps, they reveal swirling layers of color that look like watercolor paintings.
- Protein Power: Add grilled chicken, turkey, tofu, or beans for a filling punch. Season with your favorite spices or a zesty sauce for extra flavor.
- Tortilla Variety: There are spinach tortillas, tomato-basil tortillas, and even those fancy rainbow tortillas to really amplify the color factor.
- Artistic Presentation: Slice them diagonally so you can see all the layers. Arrange the pieces in a row or a circle—whatever arrangement sparks joy. It’s all part of the show!
- Less Mess, More Fun: Wraps are easy to handle, making them ideal for a paint party where you might not be anchored to a dining table. You can nibble one-handed while working on your masterpiece, paintbrush in the other hand.
10. Stippling Snack Platter
- Variety is Key: A stippling effect in art is created by tons of tiny dots. Translate that to a snack platter by offering a range of bite-sized goodies: crackers, pretzels, veggie sticks, cheese cubes, fruit chunks—anything you can imagine.
- Dip Galore: Provide multiple dips—ranch, spinach dip, salsa, peanut butter, chocolate hummus—yes, it exists and it’s delicious. Each dip can be a different color, creating that wonderful polka-dot vibe.
- DIY Buffet: Guests can pick and choose, mixing flavors in a truly freeform way. It’s like each little snack is a dot in a larger edible mosaic.
- No-Fuss Setup: Just arrange everything in small clusters, making sure the colors and shapes vary. The result looks playful and inviting, perfect for a casual, artsy crowd.
- Encourage Exploration: Stippling might look random, but it’s actually quite controlled. Your snack platter can be the same way—seemingly effortless, yet totally strategic in its arrangement. Once the party’s over, watch how quickly that platter disappears.
11. Modernist Mini Quiches
- Tiny Works of Art: Mini quiches are not only adorable; they’re super convenient for parties. Bite-sized portions mean no messy slicing or big serving spoons.
- Flair with Fillings: Don’t be shy—experiment with combinations like spinach and feta, bacon and cheddar, or roasted veggies and goat cheese. The more vibrant the ingredients, the more artsy they’ll look.
- Egg-cellent Canvas: Eggs are a blank slate for flavor. Add fresh herbs, a sprinkle of paprika on top, or even mix in some colorful bell peppers for visual punch.
- Pop ‘Em in the Oven: Use a mini muffin tin. It’s the perfect vessel for creating uniform little quiches. Once baked, they’ll puff up into golden clouds.
- Modern Presentation: Arrange them in geometric patterns or stack them on tiered trays. Each quiche feels like a bold, modern art piece you can pop right into your mouth. And they’re surprisingly filling—so a few go a long way.
12. Sculptural Sliders
- Tiny Burgers, Big Impression: Sliders always feel a little special, especially when you garnish them with fun extras like onion straws or pickled jalapeños.
- Sculptural Arrangement: Line them up like neat rows of sculptures or build a “slider pyramid.” Add toothpicks with decorative tops to keep them stable (and visually interesting).
- Mix & Match Flavors: Offer different patties—beef, chicken, veggie, or even pulled pork—to suit every taste bud. Then accessorize with a rainbow of sauces, cheeses, and toppings.
- Flavorful “Paints”: Think of ketchup, mustard, BBQ sauce, or aioli as your “paint.” Guests can drizzle or dunk to create their own slider masterpieces.
- Easy to Grab & Munch: Nobody has to commit to a whole burger. They can sample different types, which is perfect for a paint party where variety is half the fun. No two sliders have to look (or taste) the same!
13. Gourmet Graffiti Guacamole
- Classic with a Twist: We love guac for its creamy goodness, but let’s dial up the visual impact. Think bright toppings like diced tomatoes, cotija cheese crumbles, fresh corn, or even pomegranate seeds if you’re feeling adventurous.
- Graffiti Flair: Scatter these toppings across the top of the guac in messy, artful bursts—like spray paint. You can also drizzle a contrasting sauce, like spicy crema or chipotle mayo, to add lines of color.
- Guac Station: If you want to make it interactive, let guests add their own “tags.” Set out bowls of extra ingredients, so folks can customize the guacamole to their own wild design.
- Taco-Ready: This guac pairs perfectly with chips, obviously, but also with mini taco shells or crisp tortillas. And hey, you can’t go wrong with a guac-lathered slider either.
- Party Hero: Guacamole rarely goes uneaten at parties, and a “graffiti” version turns it into both a conversation starter and a satisfying snack. Just be prepared for it to vanish in record time.
14. Chroma Cupcakes
- Pastel or Neon?: Cupcakes are basically individual blank canvases waiting to be decorated. You can swirl pastel colors for a soft watercolor vibe or go full neon for a bolder statement.
- Frosting Fun: Use multiple frosting bags loaded with different shades. Swirl them together to create a marbled effect. Finish with sprinkles, edible glitter, or candy confetti if you want that extra “wow.”
- Flavor Freedom: Keep the base simple with vanilla or chocolate, or go adventurous with lemon, red velvet, or even matcha. It’s about layering color on top, so choose whichever flavor you love most.
- Easy Distribution: Cupcakes mean no slicing, no fuss, and everyone gets the same portion. That’s a win for the host who wants to keep things low-maintenance.
- Eye-Catching Display: Arrange the cupcakes in tiers or in a shape—like a painter’s palette or a rainbow arc. The swirl of colors will tempt everyone to snap photos before they devour them.
15. Neon Nachos
- Bright & Cheesy: Nachos are a no-brainer for any casual gathering. But let’s up the ante: choose colorful chips (yes, they exist—blue corn, red beet, spinach) and top them with neon-bright salsas, queso, and fresh veggies.
- Layer It Up: Start with a base layer of chips, add cheese, then scatter bright ingredients like diced tomatoes, jalapeños, corn kernels, and black beans. Repeat until you have a mountain of madness.
- Pop of Flavor: A drizzle of hot pink pickled onion or a creamy lime-cilantro sauce can take your nachos from typical to extraordinary. It’s like giving a fluorescent highlight to your edible “painting.”
- Serve Hot: Make sure to pop them under the broiler for a minute or two to melt the cheese. The gooey factor is half the fun!
- Chaotic Good: There’s something wonderfully messy about nachos. Embrace it. Encourage guests to dive in with their hands or scoop up all that melted deliciousness with extra chips on the side. It’s a communal joy.
16. Brushstroke Brownies
- Fudgy Canvas: Start with your favorite brownie recipe. Whether you like them cakey or fudgy, brownies are the ultimate chocolate canvas.
- Artful Drizzle: Instead of a plain top, melt white or colored chocolate in a few shades—pink, green, blue, you name it—and use a spoon to paint big, bold brushstrokes across the surface.
- Candy “Brushes”: For a finishing flourish, you can stick candy shards or decorative chocolate pieces onto the brownies to mimic the look of real brush bristles. It’s playful and definitely Instagram-worthy.
- Squares or Bites: You can cut the brownies into big squares or bite-sized pieces, depending on how substantial you want your dessert offerings to be.
- Guaranteed Crowd-Pleaser: Chocolate rarely fails to please. Adding an artistic spin makes it feel sophisticated and whimsical at the same time. Honestly, good luck saving any for yourself.
17. Dab of Dip
- Spectrum of Sauces: Sometimes all you need is a variety of dips to keep people satisfied—think beet hummus (bright purple), spinach dip (vibrant green), buffalo sauce (fiery orange), and classic salsa (bold red).
- Finger-Friendly Foods: Pair them with mini breadsticks, veggie spears, tortilla chips, or even chicken tenders if you’re aiming for a heartier snack.
- Blend & Match: Encourage guests to experiment by mixing dips—or at least trying them in different combos. It’s basically the food version of mixing paint on a palette.
- Minimal Cook, Maximum Impact: This is the perfect option if you’re short on prep time. Just line up bowls or shot glasses filled with dips and watch guests go to town.
- Perfect Filler: Between painting sessions or while waiting for something to bake, folks can casually grab a dab of something tasty without committing to a huge plate of food.
18. Pigment Pancakes
- Rainbow on a Plate: Pancakes aren’t just for breakfast. Imagine a stack of mini pancakes in pastel shades or bold, bright colors. It’s as if you unleashed food coloring on your favorite fluffy treat.
- Toppings Galore: Offer whipped cream, berry compote, chocolate syrup, or even savory toppings like bacon crumbles for a sweet-and-salty kick. When layered, they resemble a swirl of color on a painter’s palette.
- Breakfast-for-Dinner Twist: Pancakes for dinner feels rebellious in the most comforting way. Plus, the novelty factor is a big hit for both kids and grown-ups.
- Shape-Shifting: You can use pancake molds to create heart shapes, stars, or abstract blobs—whatever fits the spirit of your party. Each pancake becomes its own mini artwork.
- Serve Hot: Set up a griddle station if you can—there’s something interactive and exciting about flipping pancakes on the spot. Let guests watch the batter transform into fluffy edible canvases right before their eyes.
19. Creative Cucumber Canapés
- Refreshing & Light: Sometimes you need a crisp, cool bite amidst all the heavier fare. Cucumber slices are an easy vehicle for spreads, cheeses, or dollops of savory mousse.
- Colorful Toppings: From whipped feta with roasted red peppers to guacamole with a sprinkle of paprika, the possibilities are endless. The pop of green cucumber rounds everything out.
- Incredible Edges: For extra elegance, use a vegetable peeler to create ridges along the cucumber skin, or cut them into neat shapes. It’s the small details that can make these canapés look like mini sculptures.
- Bite-Size Brilliance: People can grab one and keep mingling. No utensils or heavy plates required, which is ideal when you’re trying to keep your creativity flowing on the paint front.
- Pro Tip: Pat the cucumber slices dry before adding toppings so they don’t water everything down. Nobody wants a soggy canapé, after all!
20. Spectrum Salad Jars
- Layered Beauty: Mason jars aren’t just for rustic flower arrangements. Layer different salad components in them—dressing at the bottom, sturdy veggies next, followed by lighter veggies, proteins, and greens on top.
- Rainbow Effect: Think red peppers, orange carrots, yellow corn, green cucumbers, purple cabbage—the more colorful, the better. It looks like a rainbow gradient that you can shake up and eat.
- Shake & Serve: When it’s time to eat, guests can just shake the jar to distribute the dressing. It’s fuss-free and super photogenic.
- Individual Portions: No more waiting in line for a big bowl or dealing with spilled salad. Each person gets their own jar, so it’s easy, personal, and portable.
- Eco-Friendly Bonus: Jars are reusable, and this method also prevents the dreaded soggy salad scenario. It’s healthy, visually stunning, and a perfect fit for an artsy gathering.
21. Vibrant Veggie Skewers
- Color is the Star: Load skewers with chunks of zucchini, bell peppers, red onions, cherry tomatoes, and mushrooms. Marinate in your favorite sauce or dressing to bring out those bright hues.
- Grill or Roast: Fire them up on the grill or in the oven, letting the edges caramelize for that sweet, smoky flavor. The sizzling rainbow effect is mouthwatering.
- Multi-Dip Option: Pair them with a lineup of dips—peanut sauce, tzatziki, spicy ketchup—like little paint pots for each color. It’s interactive and encourages guests to play with their food in the best possible way.
- Healthy & Tasty: Veggies get overlooked sometimes, but give them the right seasoning and marinade, and they become a party highlight. This is a great way to balance out heavier dishes.
- Easy Cleanup: Skewers mean minimal plate clutter. Plus, it’s super fun to wave them around like miniature swords—just hopefully without any actual fighting at your paint party!
22. Dazzling Deviled Eggs
- Elevate the Classic: Deviled eggs are a staple at many parties, but you can give them an unexpected punch of color. Try mixing a little avocado into the yolk mixture for green, or add beet juice for a pink hue.
- Spice It Up: Beyond the usual mustard and mayo, add a sprinkle of paprika, chili flakes, or fresh herbs on top. A drizzle of spicy sriracha or basil pesto can also offer a burst of contrasting color.
- Pretty Plating: Arrange them in a circle or a grid, letting each color variation stand out. Think of it as your egg “gallery.”
- Snack or Meal?: These can be surprisingly filling, especially if you load them with extra toppings like crispy bacon bits, pickled onions, or a touch of cheese. They might just vanish faster than you expect!
- Keep It Simple: The best part is, they’re still super easy to make. Boil eggs, scoop out yolks, mix with your chosen ingredients, and refill. A piping bag can help you swirl the filling back in, but a spoon works just fine too.
23. Edible Palette Cookies
- Painter’s Palette Shape: Bake sugar cookies in a palette-like shape (think oval with a small thumb hole or just a rough oval). If freehand is tricky, you can make a simple template on parchment paper.
- Icing Spots: Leave the majority of the cookie plain, then add small dabs of brightly colored icing around the edges to look like paint blobs.
- Double Duty: These cookies can be both decorative and delicious. Line them around the dessert table, or even place one at each guest’s seat for a charming “welcome to the party” treat.
- Have Fun with Flavors: The cookie base can be vanilla, lemon zest, or even a chocolate swirl. The icing can be your basic buttercream or royal icing—just as long as it’s bright and eye-catching.
- DIY Painting Experience: You could go a step further and provide edible food markers so guests can doodle or write messages on their cookies. It’s like combining snack time and art class in one sweet treat.
24. Artistic Antipasto Platter
- Mediterranean Muse: Gather cured meats, cheeses, olives, pickled vegetables, and crunchy breadsticks. Place them in a way that highlights the variety of textures and colors.
- Layer & Stack: Roll salami slices into rosettes, fan out prosciutto, and place chunks of cheese near juicy olives. The arrangement should feel like a tapestry of flavors—think bold reds, deep greens, creamy whites.
- Savory Swirls: Drizzle olive oil over roasted red peppers or artichokes, adding an extra sheen that catches the eye. It’s like layering gloss on a finished painting.
- Flexible Format: This platter can be as big or small as you want, depending on your crowd size. It’s a classy way to offer finger foods without having to meticulously assemble each bite.
- Invites Exploration: Antipasto platters encourage nibbling and discovering new favorite combos—maybe a slice of cheese with a marinated olive, or a bite of prosciutto rolled around a crunchy breadstick. It’s interactive, delicious, and very European-chic.
25. Color Block Cocktails
- Layered Sips: Whether you prefer cocktails or mocktails, layered drinks always turn heads. By carefully pouring liquids of different densities and colors, you create distinct layers that look like modern art in a glass.
- Easy Ratios: Typically, you start with the heaviest syrup or juice at the bottom, then slowly pour the lighter liquids over a spoon to keep them from mixing too quickly.
- Vibrant Options: Try combinations like cranberry juice, pineapple juice, and blue curaçao for a tropical rainbow. Or go non-alcoholic with grenadine, orange juice, and lemon-lime soda.
- Serve in Clear Glasses: The whole effect is wasted if you can’t see the color block. Use tall, clear cups or glasses so everyone can marvel at the artistry.
- Sip & Stir?: Let guests decide if they want to stir it up or enjoy each layer separately. It’s a fun choice that adds an extra interactive element—a final creative act to wrap up your paint party in style!
Feel free to mix and match these ideas depending on your crowd’s preferences (and your own stamina in the kitchen). Above all, have fun with it. A paint party is all about free expression, and the food should be no exception. Happy creating—both on the canvas and on the plate!