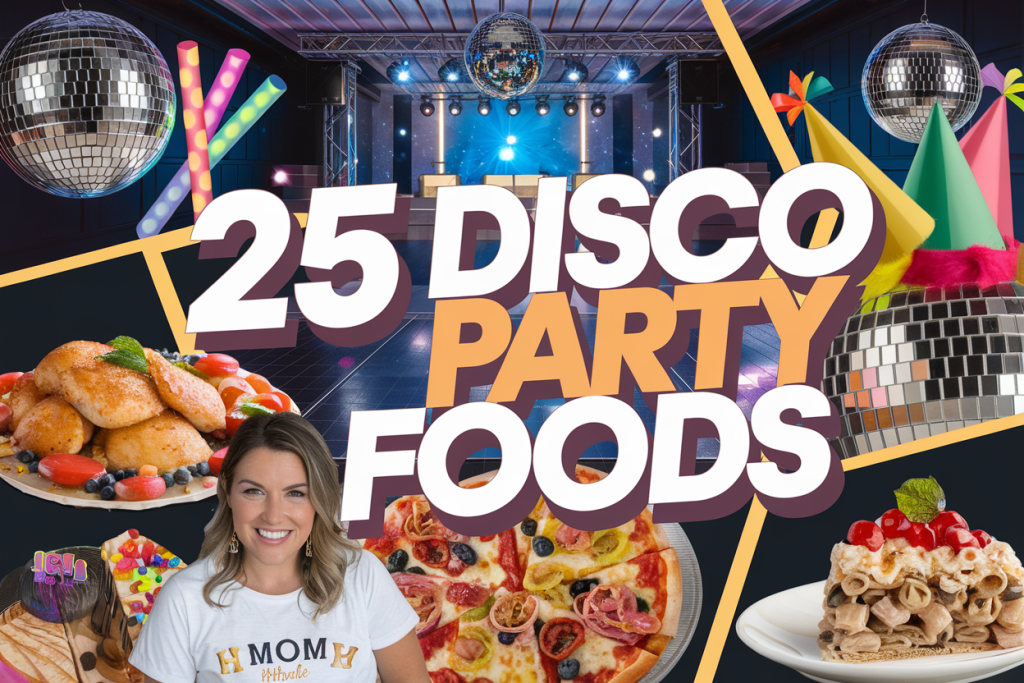
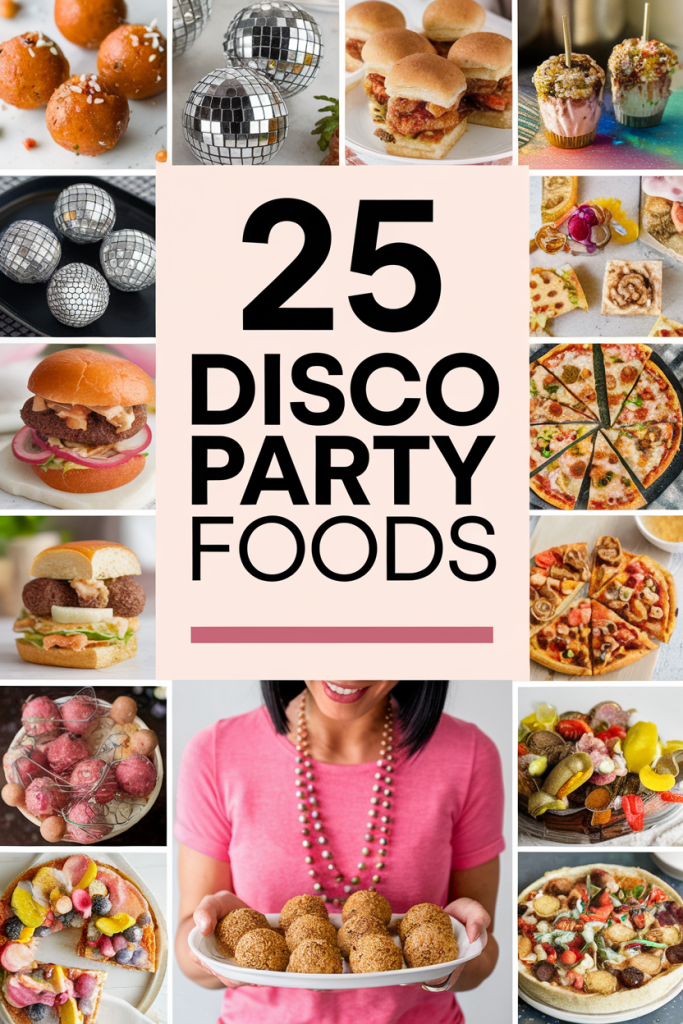
Disco Party Food Ideas
Throwing a disco party? You’ll want to keep the energy up and the dance floor packed, which means fun and easy food is a must. Check out these 25 simple snack and treat ideas that will add flair to your event without requiring hours in the kitchen. From finger foods to sweet bites, there’s something here to satisfy everyone’s cravings while you boogie the night away!
Light Up The Night With Disco Party Supplies
Bring that mirror ball magic to your celebration with silver tinsel curtains, holographic tableware, disco ball balloons, neon LED lights, groovy banners, vinyl record props, and photo booth backdrops. Build a throwback look for birthdays, youth nights, or church socials in minutes. Mix and match pieces to fit your theme, venue, and budget, then get ready for a dance floor everyone will remember.
Shop Disco Party PicksDisco Ball Pizza Bites
Who doesn’t love pizza in miniature form? Disco Ball Pizza Bites let you combine two party favorites—pizza and sparkles—into one epic finger food. Think of it as the glittery cousin of your basic pizza rolls. These little spheres of cheesy goodness are arranged in a pattern so they vaguely resemble a shimmering disco ball.
Making them is surprisingly easy. You can use ready-made biscuit dough or pizza dough—whatever saves you some sanity! Then scoop out tablespoon-sized portions, flatten, fill with cheese, pepperoni, or veggies, and seal them up into little balls. Once baked, the outside gets nicely golden, and all that cheese inside turns delectably gooey. But don’t stop there; the disco factor is in the details.
- Add edible glitter or shimmering dust: Lightly sprinkle it on top once they’re out of the oven. It’s subtle but catches the light in a cool way.
- Creative toppings: Pepperoni, pineapple, mushroom, or even a spicy chorizo if you like a bolder flavor. Let’s be honest, after the third piece, you might get adventurous and reach for the jalapeños.
- Fun sauces: Serve them with marinara, garlic butter, and maybe a ranch dip. It’s a mini pizza, so dipping is basically mandatory.
- Presentation tip: Arrange the bites on a circular platter in concentric rings to really drive home that disco ball vibe. If you’re feeling extra, pop a small LED light in the center to reflect off those sparkles.
These are great for both dinner parties and birthday bashes, because who can say no to pizza—especially when it’s bite-sized, shimmering, and full of cheesy wonder? It’s the simplest way to make your guests feel like they’re dancing under a mirror ball, except the ball is edible… and way more delicious.
Groovy Glitter Popcorn Balls
Now, if you’ve ever wrestled a toddler over a bag of popcorn or tried to keep your party snacks from being utterly boring, these Groovy Glitter Popcorn Balls are here to rescue you. They’re showstoppers for any party that wants a little 70s glam. The moment people see the edible glitter shimmering on each popcorn cluster, they’ll do a double-take—like, “Wait, are we actually allowed to eat glitter?” Yes. Yes, we are.
Start with a base of air-popped or stove-popped popcorn. Then melt a sticky mixture—often marshmallows and a bit of butter or even a corn syrup-based caramel—and stir it right in. Carefully mold it into palm-sized balls. This part can get a bit messy, so it’s usually a good idea to lightly grease your hands or use food-safe gloves to avoid feeling like you’re wrestling with warm taffy.
- Edible glitter: You can find various food-safe glitters online or at specialty baking shops. Go for a shade that complements your party color scheme or choose classic silver or gold for that authentic disco vibe.
- Optional mix-ins: Chocolate chips, colorful sprinkles, or even chopped nuts can add texture and extra flavor.
- Serving suggestion: Place each ball in its own cupcake liner to prevent them from sticking together. Or spear them with fun, decorative picks—maybe something that glows in the dark or something with a mini disco ball topper.
Popcorn balls are also super easy to adapt to different tastes: keep them plain for the purists or go wild with funky flavorings like salted caramel or spicy chili-lime. And because they’re so portable, they’re great for a buffet table or a pass-around snack tray, ensuring that your party guests can keep dancing without being weighed down by a knife and fork. It’s basically like serving edible glitter bombs, but in the sweetest, most kid-friendly way possible.
Funky Fruit Skewers
If you’ve ever tried to sneak fruit into a party spread, you know the drill: the fruit bowl stands untouched next to the cookies and chips until someone—usually me—guiltily nibbles on a grape. Enter the Funky Fruit Skewers, which transform that lonely fruit platter into something that looks straight out of a disco-era photo shoot.
The trick is all in the arrangement. You want bright, contrasting colors: kiwi, strawberries, pineapples, grapes, watermelon, and maybe some blueberries or dragon fruit for flair. Skewer them in patterns that feel playful and eye-catching. If you want to go the extra mile, you can use small cookie cutters to shape the fruit into stars or hearts. Suddenly, you’ve got a fruit arrangement that glitters under party lights—especially if you brush a little edible shimmer on top.
- Assembly tip: Aim for uniform sizes so the skewers don’t topple. Pineapple chunks should be about the same size as the watermelon cubes, for instance.
- Dress it up: Lightly spritz the fruit with a mixture of lemon juice and honey to add shine and keep things fresh.
- Presentation: Arrange the skewers in a standing display by poking them into a foam cone or even half a watermelon. That way, they look like a disco-inspired centerpiece, not just a stack of random fruit.
- Health-conscious: These skewers also provide a refreshing break from all the sugary treats. Kids and adults who are looking for something a bit lighter will appreciate the option—especially after sampling all those glitter-drenched desserts!
Funky Fruit Skewers manage to dazzle without a major sugar rush. It’s a small but mighty detail that’ll remind your guests: yes, we can still boogie down and be somewhat healthy, too! Who said fruits can’t be cool?
Boogie Woogie Burger Sliders
Ever feel like a full-size burger is too much for a party where everyone just wants to snack and dance? Boogie Woogie Burger Sliders solve that problem by offering bite-sized indulgence without the need for a towering bun situation. They’re adorable, they’re delicious, and they’re easier to handle while you’re busting out your best disco moves.
Start with mini buns—Hawaiian rolls are a fan favorite because of their slight sweetness. For the patties, you can shape smaller portions of ground beef or turkey, or go plant-based if you have vegetarian friends in the mix. Add a dash of onion soup mix or your favorite seasoning to the meat for that extra flavor punch.
- Retro twists: Think about classic burger toppings but with a disco-era twist—like a bit of tangy relish, special sauce, or even a pineapple ring.
- Assembly: Toast the buns lightly so they don’t get soggy. Layer your sauce, patty, cheese, lettuce, and any extras. Use a toothpick topped with a mini disco ball or a bright tassel to keep everything together.
- Variety: Offer at least two or three flavor combos—like a cheesy slider, a BBQ slider with caramelized onions, and maybe a spicy jalapeño slider for the adventurous ones.
- Decor tip: Serve them on a mirrored tray if you can find one—that reflection effect pairs perfectly with the 70s theme.
Sliders are a killer option for both disco dinner parties and kid-friendly birthdays. Nobody wants half-eaten burgers lying around, so having these mini versions means people can keep coming back for seconds (or thirds!) without the guilt—or the wasted food. And while they may be small, don’t be fooled: these little burgers pack some serious flavor, like a disco beat that just won’t quit.
Retro Disco Meatballs
Meatballs might sound simple, but when you dress them up in a tangy sauce and serve them in a funky bowl, they become the life of the party. Retro Disco Meatballs are all about channeling the 70s, when cocktail parties featured little skewered bites that people would rave about for weeks. (And who are we to break with tradition?)
These meatballs can be made with beef, turkey, chicken, or even a vegetarian substitute. The key to that “retro” flavor often lies in a sweet-and-sour or grape jelly-based sauce—yes, you read that right. It’s the classic combination of savory meat with a tangy-sweet glaze that keeps everyone grabbing “just one more.”
- Sauce tips: A blend of barbecue sauce, grape jelly, and a hint of hot sauce can create the perfect sweet-spicy balance. Or go for a classic marinara if you want something more familiar.
- Serving: Pile them high in a colorful bowl, stick toothpicks in a few, and place a disco-themed sign next to them. Minimal effort, maximum retro charm.
- Pairing: These go great with other party foods like disco ball deviled eggs or boogie woogie sliders. For an extra 70s flair, you could offer side dips like ranch or a mustard-mayo swirl.
- Decor: Consider placing some mirrored coasters or mini disco ball ornaments around the bowl. It’ll reflect light onto the meatballs, giving them an almost glistening effect—if that doesn’t say disco, I don’t know what does.
The real beauty is that meatballs freeze well, so if you end up with leftovers (unlikely), you can save them for a quick dinner later in the week. Because, trust me, once you’ve tried them, you’ll wish you could spin these into your meal rotation every night. They’re that addictive, and your guests will wholeheartedly agree.
Light-Up Lemonade Station
If you’ve ever watched guests meander around, cups in hand, not sure what to do next, a Light-Up Lemonade Station is exactly the showstopper you need. Part beverage hub, part disco-themed decoration, it immediately becomes a gathering spot for sippers and chatty folks alike.
First, let’s talk about the lemonade. You can go classic with fresh-squeezed lemons, water, sugar, and maybe some basil or mint for a twist. Or spice it up with variations like strawberry, lavender, or even a zingy ginger lemonade. The real disco magic happens when you add LED accents—like glow sticks or color-changing LED ice cubes—to your pitchers and drink dispensers.
- Station setup: Cover the table with a shiny, metallic tablecloth. Place a big clear drink dispenser in the center with your lemonade. Add a few LED puck lights underneath if you want to create a glowing effect.
- DIY flair: Let guests customize their drinks. Offer slices of lemons, limes, or oranges, plus maybe a few flavor syrups in small pumps.
- Presentation: Tiny disco ball stirrers or straws take your drink station from ordinary to unforgettable. You can also attach mini mirrors or glittery stickers to the dispenser for extra sparkle.
- Double-duty: This station works as both a hydration zone and a conversation piece. If you’re hosting a kids’ party, they’ll love picking out different light-up cubes or colored straws to make their lemonade unique.
The best part? It’s so easy to assemble and maintain. Just keep refilling the lemonade when it gets low and watch your guests’ faces light up—literally—as they discover the glow factor. Whether it’s a swanky 70s party, a laid-back birthday, or just a warm summer night, a Light-Up Lemonade Station is your chance to keep things refreshing while still staying on theme.
Shimmering Salad Jars
Let’s be honest: salads often end up looking sad and neglected on a party table—unless you give them a disco-worthy makeover. Shimmering Salad Jars do exactly that. Not only are they practical (everyone gets their own portion), but they also allow you to show off colorful layers of veggies that sparkle with edible shimmer or just natural glistening dressings.
Start by selecting your favorite jar size—mason jars work great because you can see all the layers. Begin with your dressing at the bottom, followed by hearty ingredients like cherry tomatoes, cucumbers, or chickpeas that won’t wilt if they touch the dressing. Then add layers of lettuce, spinach, shredded carrots, and maybe some grains like quinoa or couscous. Top it off with proteins such as grilled chicken strips, tofu, or feta cheese.
- The shimmer effect: Lightly dust the inside rim of the jar with edible glitter. It’s subtle but looks fabulous when the jar catches the light. You can also sprinkle a bit on top of the salad, but be gentle—too much and it might feel like you’re eating sand.
- Customizable: Lay out a selection of dressings if you’d rather let guests fill their own jars. Some might prefer a zesty vinaigrette, while others crave a creamy ranch.
- Healthy disco: This is the perfect way to keep the health-conscious folks happy without sacrificing the fun. Plus, kids might be tempted to eat more greens if they look all sparkly and special.
- Easy to serve: No plating needed! People can shake their jar to distribute the dressing, then dig in with a fork.
Shimmering Salad Jars prove that healthy party options don’t have to be boring. They’re Instagrammable, portable, and on theme for modern disco gatherings—especially if you group the jars together on a reflective tray that bounces light and shows off all those vibrant colors.
Dazzling Dip Platter
Ah, the ultimate crowd-pleaser: a dip platter that invites double-dipping (in a polite way, of course). But how do we add that disco flair? The answer is all in the arrangement and presentation. A Dazzling Dip Platter can feature multiple dips—salsa, guacamole, queso, spinach artichoke, or hummus—laid out in a circular pattern reminiscent of a disco dance floor.
The base could be a large round platter, ideally with some sparkly or mirrored elements. Place small bowls of dip at equal intervals around the platter’s edge. Between them, arrange your dippable items: tortilla chips, pita wedges, veggie sticks, or even bread cubes. You can add mini disco ball toothpicks into the dips as a fun garnish.
- Flavor variety: Provide both mild and spicy options. Folks will appreciate the range, especially if you have heat-lovers and heat-avoiders in the same room.
- Visual interest: Colored tortilla chips or a sprinkle of edible glitter on top of the guacamole. If you can’t find “disco dust,” you can even use a dash of gold or silver sprinkles that are labeled edible.
- Space management: Keep an eye on the layout. You want easy access to each dip without causing a traffic jam around the platter.
- Pro tip: If you’re hosting a big crowd, consider multiple platters or a tiered setup. The bottom tier could hold extra chips, and the top tier could display the dips in smaller bowls.
This Dazzling Dip Platter isn’t just about the food—it’s about the vibe. People gather around, share opinions on the best dip, and chat freely. It’s like the disco version of a watercooler. You’ll find that your guests stay around the snack zone, happily munching and socializing, which is exactly what a disco party is all about—good music, good people, and definitely good dips.
Neon Noodle Salad
When you think “pasta salad,” you might picture something bland with mayo. But a Neon Noodle Salad is about as far from that as you can get. It’s a vibrant mix of colorful noodles, crunchy veggies, and tangy dressing. The key is choosing brightly colored vegetables—think purple cabbage, orange carrots, yellow bell peppers, and maybe some edamame for a pop of green.
For the noodles, go for something that won’t get soggy—like fusilli, bow ties, or soba noodles. Cook them until just al dente, then rinse them under cold water to stop the cooking and keep them firm. Toss everything in a zesty dressing (ginger-soy, sesame-lime, or a simple vinaigrette). To really amp up the disco effect, you could garnish with edible glitter or neon-colored sesame seeds (yes, those exist!).
- Bold dressing: Aim for something with a bright, tangy flavor. You want the taste to match the color intensity.
- Texture balance: Mix in crunchy elements like carrots and bell peppers with softer ones like avocado chunks or tomatoes to keep each bite interesting.
- Party angle: This dish can sit out for a while without losing its appeal. Perfect for buffet-style service at a disco dinner party.
- Light vs. hearty: Want it more filling? Add some protein like grilled chicken, shrimp, or tofu. Want it lighter? Stick with mostly veggies and a light drizzle of dressing.
The “Neon” in Neon Noodle Salad is really about the attitude. The bright colors pop, so under your party lights, it looks almost electric. And if you’re hosting a night theme or disco party, it ties in beautifully with all the glowing elements around the room. This is the kind of salad that convinces even the carb-dodgers to have a taste—just out of pure curiosity.
Disco-Themed Cupcakes
Cupcakes are a party staple, but disco-themed cupcakes? Now we’re talking edible works of art. Picture a swirl of buttercream icing crowned with mini disco balls or a dusting of edible glitter that makes them look like they just stepped off the dance floor. They’re a surefire way to delight both kids and adults because who doesn’t love handheld cake?
Start with your favorite cupcake recipe—chocolate, vanilla, red velvet, or even a zesty lemon. The magic is in the decoration. Pipe on a generous swirl of frosting and then top it off. You can find mini plastic or sugar disco ball toppers, or get creative by rolling fondant into small spheres and painting them with silver luster dust.
- Color combos: Embrace bold 70s hues, like hot pink, neon green, or bright purple frosting. For a simpler palette, go with black or silver wrappers so your disco details stand out.
- Glitter game: Edible glitter can be sprinkled all over the frosting. Or you can dip just the edges of the frosting swirl for a more refined glitter effect.
- Mix & match: If you’re serving a variety of cupcakes, label them with fun disco references like “Boogie Berry” or “Funky Chocolate.”
- Practical tips: Store them in a cool place so the frosting doesn’t melt under the party lights. Also, provide napkins—lots of them. Glitter has a way of traveling.
These cupcakes are perfect for birthdays, adult-themed disco nights, or any event that calls for a little sparkle. They create an instant “wow” factor when displayed on a tiered stand, especially if you place a small disco ball decoration at the top. Trust me, once your guests see these shimmering sweets, they’ll line up faster than they do for the dance floor.
Funky Fondue Fountain
Fondue may scream “retro,” but a Funky Fondue Fountain screams “I love the 70s—and I’m not afraid of a little mess!” This can be either cheese fondue or chocolate fondue, depending on your guest list’s cravings. But the idea is simple: a flowing fountain of warm, delicious dip that doubles as a cool decoration.
- Chocolate vs. cheese: A chocolate fountain is perfect for dessert (fruit, marshmallows, pretzels), while a cheese fountain is ideal for savory dipping (bread cubes, veggies, tortilla chips). If you can swing it, offer both!
- Conversation starter: Let’s be real, people love interactive food. When they see that flowing cascade, it’s like they’re magnetically drawn to dip anything and everything.
- The disco twist: Surround the base of the fountain with mirrored tiles or LED lights to reflect on the liquid’s surface. If you’re feeling extra, you can sprinkle edible glitter on top, but be cautious—too much might clog the fountain.
- Cleanup: Here’s the honest truth: fondue fountains can be messy. Cover the table with a plastic or disposable tablecloth, and keep extra napkins handy. This is not the time to be stingy with the paper goods.
Whether you choose cheese or chocolate (or a wild attempt at both), the fountain is a spectacle. It gives everyone an excuse to gather, chat, and dunk. And let’s face it, at a disco-themed party, the more interactive and unique your food station is, the better. Just watch out for kiddos (and a few enthusiastic adults) who might try to dip their entire hand in there. It’s disco, after all, and things can get a little wild!
Flashy Fruit Punch
Fruit punch doesn’t have to be the mundane bowl of neon red liquid you remember from your youth. Amp it up into a Flashy Fruit Punch that not only tastes refreshing but also glows—yes, glows—under party lights. The easiest way is to use a clear punch bowl or transparent dispenser and place LED lights or glow sticks underneath it. If your container sits on a pedestal, even better.
- Fruit combos: Mix fruit juices like pineapple, orange, cranberry, and maybe a splash of lemon-lime soda for fizz. Throw in slices of fresh fruit (or frozen fruit chunks) to keep it chilled.
- Disco detail: Float slices of citrus and strawberries on top, then sprinkle edible glitter if you want that extra sparkle.
- Non-alcoholic or spiked: If you’re hosting a family-friendly bash, keep it simple and sweet. For an adult night, a splash of rum or vodka can turn it into a disco cocktail.
- Illuminated pitchers: If you have multiple pitchers, line them up with small battery-powered lights behind them. It makes your drink station look like it’s part of the dancefloor setup.
Whether it’s a daytime gathering or a late-night soiree, a visually appealing punch bowl can be the centerpiece of your beverage offerings. People love ladling out their drinks—there’s something nostalgic about that. Plus, it’s infinitely easier than mixing individual cocktails. All you need is a ladle, a stack of cups, and a sign that reads “Flashy Fruit Punch—proceed with caution,” because with great glow comes great refreshment.
Sparkling Starburst Cheesecakes
Calling all dessert lovers who want to feel like they’re biting into a piece of actual disco decor! Sparkling Starburst Cheesecakes are mini cheesecakes topped with either star-shaped fruit slices or star-shaped candies, plus a touch of edible glitter for that glam finish. The idea is to have a smooth cheesecake base—classic vanilla, strawberry, or even lemon-lime—sitting in a crunchy graham cracker crust.
- Mini format: Use a muffin tin lined with cupcake wrappers or a silicone mold. Smaller portions mean guests can snag one without feeling too guilty—though they might come back for seconds.
- Star toppings: Carefully cut mango, kiwi, or melon into star shapes. If you’re not big on fruit, star sprinkles or sugar decorations work too.
- Glitter garnishing: A gentle dust of food-safe glitter elevates these cheesecakes to disco status. Focus on the star shape or lightly dust the entire top.
- Pro tip: Serve them chilled on a platter arranged in a circle, echoing a disco ball’s shape. If you place a small mirror or reflective tray underneath, you’ll see little sparks of light dancing around the table.
These cheesecakes are great for those who want to indulge in something creamy and rich without going overboard on portion size. They’re also easy to prep ahead—just store them in the fridge and pop them out right before dessert time. When your guests see “stars” in their treats, it’s a whimsical reminder of the night’s theme. After all, a disco party is all about shining bright, and these Starburst Cheesecakes do just that—one bite at a time.
Boogie Bites Quesadillas
Feeling like you need a little Tex-Mex flair at your disco party? Boogie Bites Quesadillas are your answer. They’re mini quesadillas stuffed with bold fillings like spicy chicken, seasoned beef, or sautéed vegetables, then grilled or baked until they’re crispy on the outside and melted on the inside.
The secret to making them “disco” is in the garnish and display. Use small tortillas or cut a large tortilla into quarters. Once they’re golden brown, stack them up on a platter and sprinkle some chopped cilantro and maybe a pinch of edible glitter for a cheeky disco nod.
- Filling variety: Offer both meaty and veggie versions. Think cheesy bean and jalapeño, chicken with bell peppers, or even a sweet-savory combo like pineapple and pulled pork.
- Dipping sauces: Salsa, guacamole, sour cream—or go wild with a queso dip that ties back to that funky fondue station you might have.
- Party-friendly: Quesadillas are best served warm, but they’re still tasty at room temperature. That means less stress about reheating if your dance floor is miles away from the oven.
- Easy to hold: Perfect for boogieing around the room while munching. No forks, knives, or even plates necessary if you fold them in half and secure them with a toothpick.
With their crispy outside and melty center, these mini quesadillas feel like the perfect marriage of comfort and creativity. They fit seamlessly into a disco dinner party, where the name of the game is fun, flavor, and a healthy dose of funkiness. Who needs complicated entrées when you can stack a platter with sizzling wedges of cheesy goodness? Trust me, your guests will keep coming back, whether they’re breakdancing or just awkwardly swaying in the corner (we’ve all been there).
Retro Veggie Platter with Dip
A veggie platter might sound like the least disco thing on the planet, but not if you arrange it retro style with a bright, funky pattern. You know those old-school veggie trays where carrots, celery, radishes, and olives form geometric shapes? Time to resurrect that vibe—only this time, we’re giving it a 70s spin.
Pick bold-colored veggies: purple cauliflower, vibrant peppers, cherry tomatoes, and maybe some unusual finds like rainbow baby carrots. Arrange them in concentric circles or spirals on a round tray. In the center, place a dip that’s full of flavor—spinach-artichoke, roasted red pepper hummus, or an herby ranch can do the trick.
- Pattern play: The more symmetrical, the better. It becomes almost mesmerizing to look at—like a kaleidoscope, but edible.
- Dip decoration: Add a swirl of edible glitter on top of the dip or garnish with fresh herbs.
- Textural variety: Include crunchy items like bell peppers alongside softer ones like sliced cucumbers. Different textures are key to keeping snacking interesting.
- Table synergy: Surround the platter with a few disco ball picks or maybe a small strobe light. Who said veggie platters can’t be groovy?
This platter not only helps balance out all the indulgent goodies like cupcakes and sliders, but it also adds a visual pop to your disco table. It’s a subtle wink to health without being a total buzzkill. People will feel good about munching on some carrots and dip before heading back to the dance floor for the next hit. Who knows? Perhaps they’ll even brag about how they found the healthiest snack at the disco. Stranger things have happened!
Disco Ball Deviled Eggs
Deviled eggs aren’t typically described as “glam,” but add a little shimmer and suddenly they’re the star of your snack spread. Disco Ball Deviled Eggs involve a classic deviled egg filling—egg yolks, mayo, mustard, a little paprika, maybe some relish—piped back into the egg whites. But here’s the kicker: a light sprinkle of edible glitter or metallic food spray that makes them glow like tiny disco balls.
- Flavor hack: If you want a tangier filling, throw in a dash of hot sauce or a bit of vinegar. For a sweeter twist, add sweet relish or a hint of honey mustard.
- Presentation: Line them up on a mirrored tray or a foil-covered platter so they reflect the light.
- Color coding: If you’re feeling adventurous, you can dye the egg whites in water tinted with food coloring. Neon pink deviled eggs, anyone?
- Garnish: A sprinkling of chives or paprika is classic. For the disco look, just ensure your shimmer is food-grade and not overdone; you don’t want your eggs tasting like craft supplies.
The unexpected glam factor of Disco Ball Deviled Eggs will wow your guests—especially those who appreciate a good throwback appetizer with a modern twist. Deviled eggs also happen to be relatively simple and budget-friendly, making them a great option when you need a fancy look without spending hours in the kitchen. Your biggest problem might be that they disappear too fast, so consider making a double batch. After all, disco never dies—so your deviled eggs shouldn’t either.
Neon Nachos Supreme
Let’s talk nachos. They’re already a party superstar, but when you bring in neon-colored chips and loads of vibrant toppings, they turn into Neon Nachos Supreme—a dish worthy of a disco spotlight. Typically, nachos are a haphazard pile of chips, cheese, salsa, beans, and maybe some jalapeños. But to match your disco vibes, you’ll want to dial up the color.
- Base layer: Seek out tri-colored tortilla chips or drizzle a few drops of neon food coloring on homemade chips if you’re up for a DIY challenge.
- Cheese factor: Melted cheddar is classic, but add a drizzle of queso for that extra gooey goodness.
- Toppings: Consider black beans, diced tomatoes, sliced olives, jalapeños, and a dollop of guacamole. Colorful peppers—red, yellow, orange—add a rainbow effect.
- Serving: Spread them out on a big sheet pan so every chip gets some love, then sprinkle some chopped cilantro or green onions over the top for freshness.
- Disco style: Tiny disco ball toothpicks can hold individual chips or layers together. If you’re brave, sprinkle a bit of edible glitter on top of the cheese, but keep it minimal—no one wants gritty nachos.
Nachos are great because they’re so easy to share. Guests can stand around a table, scooping up cheesy bites while chatting about how the 70s were the golden era of funk. They also pair well with your Flashy Fruit Punch or a lineup of cocktails if you’re going the adult route. It’s messy, sure—but in the best possible way. Get ready for guests to shuffle over to the table again and again, because once you go neon, regular old nachos just won’t cut it anymore.
Light-Up Lemon Bars
You know how lemon bars have that delicate dusting of powdered sugar on top, making them look oh-so-innocent? Well, Light-Up Lemon Bars do that—and then some. The idea is simple: bake your favorite lemon bar recipe. Once cooled, dust on powdered sugar and maybe a subtle pinch of edible shimmer. But the magic truly happens in how you display them.
- Illumination: Place an LED string light or battery-powered puck lights under a glass serving tray. The soft glow shines through, adding a heavenly aura to your lemon bars.
- Flavor: Tangy lemon curd over a buttery shortbread crust never goes out of style. If you want a slight twist, mix in some lime zest or even freeze-dried raspberry powder for a pink hue.
- Cutting: Small squares or triangles are easiest for party nibbling. Clean your knife between cuts for those crisp edges that look store-bought.
- Serving suggestion: Arrange them in neat rows so each piece is perfectly spotlighted. If you’re feeling fancy, garnish with very thin lemon slices or fresh mint leaves.
A dessert that glows? Sign us up. These Light-Up Lemon Bars not only satisfy the sweet tooth but also bring a literal brightness to the party. Guests will be intrigued by the light source beneath the tray—it’s like your dessert is performing its own disco dance. Just be sure to keep an eye on how long they sit out; lemon bars are best enjoyed cool, so rotate them out if the party goes until the wee hours. The tangy taste and glowing presentation will have everyone coming back for “just one more,” even if they claimed to be full.
Dancing Disco Donuts
Donuts might seem more breakfast than disco, but when you decorate them with neon icing and a dash of sparkle, they transform into Dancing Disco Donuts—perfect for any celebration that refuses to be ordinary. Use mini or full-size donuts (baked or fried, your call), then let the topping extravaganza begin.
- Icing flair: You can buy plain donuts and dip them in homemade icing tinted with food coloring. Bright pinks, greens, and blues add that playful vibe.
- Sprinkle mania: Traditional sprinkles are fun, but disco sprinkles (metallic dragees or edible glitter) push it over the top.
- Display: A donut wall is always a crowd-pleaser. Hang them on pegs or place them on a tiered stand. If you have a small disco ball centerpiece, set it next to the donuts for a show-stopping arrangement.
- Kid and adult friendly: Let’s be honest, nobody outgrows donuts. Whether you’re hosting a kids’ disco party or an adult throwback bash, these sweet circles of happiness will vanish quickly.
Dancing Disco Donuts are a reminder that dessert doesn’t have to be formal or complicated. They’re easy to grab, easy to eat, and definitely Instagrammable—especially when you see people holding up brightly colored donuts while busting a move on the dance floor. Pair them with a strong cup of coffee if you’re hosting an evening event (some of us need that caffeine to keep dancing), or keep it playful with a variety of milk flavors—chocolate, strawberry, vanilla—on the side. Either way, donuts just became the official pastry of disco.
Funky Falafel Bites
If you’re looking to add a multicultural spin to your disco party, Funky Falafel Bites are a brilliant choice. Falafel—those crunchy, savory chickpea patties—are already party-friendly. Make them mini, serve them with a tangy dipping sauce, and voila: a plateful of globally-inspired disco flair.
- Homemade or store-bought: If you’re feeling ambitious, whip them up from scratch with chickpeas, herbs, and spices. Otherwise, many stores sell frozen falafel that crisp up beautifully in the oven.
- Sauce selection: Traditionally, falafel pairs with tahini or tzatziki sauce. But you can also offer a spicy chili sauce or a sweet mango chutney to cater to different taste buds.
- Presentation: Arrange them on a funky platter with toothpicks. A sprinkle of chopped parsley or cilantro can add a fresh pop of color.
- Disco detail: Give them a slight shimmer with a dust of gold food spray. It might seem unusual, but the moment your guests see glittery falafel, they’ll know they’re at a party that breaks the norms in the best possible way.
Falafel bites bring a satisfying crunch and a burst of flavor, proving that disco doesn’t have to be all about sugar. The chickpeas offer protein, making this a more filling snack that can keep your guests fueled on the dance floor. It’s also a conversation starter: “Wait, is that falafel at a disco party?” You bet. Because when the music’s pumping, the tastiest foods are the ones that embrace variety and keep people talking.
Boogie-Down Breadsticks
Carbs are never a bad idea at a party, especially when they’re dippable, sharable, and easy to jazz up. Boogie-Down Breadsticks are basically your standard breadsticks—soft, warm, and brushed with garlic butter—but with a disco-inspired twist. Maybe that twist is adding neon food dye to the dough, or topping them with some edible shimmer. Either way, the concept is straightforward: get breadsticks dancing off the plate.
- From scratch or frozen: If you have time, make homemade dough; if not, store-bought pizza dough or refrigerated dough can be shaped into breadsticks.
- Flavor enhancements: Mix garlic, herbs, or even cheese into the dough before baking. Post-bake, brush them with melted butter mixed with a pinch of salt and garlic powder.
- Dips: Marinara is a must. You can also offer a cheesy dipping sauce or a spicy arrabbiata.
- Visual pop: Serve them upright in a tall glass or mug. It looks sleek and keeps them accessible. Add a disco ball ornament on a stick in the center for that party vibe.
Breadsticks may not scream “70s disco” at first glance, but trust me, they’ll keep your guests happy—especially if they’re sipping cocktails and need something to munch on. If you want to be extra, scatter some edible confetti on your serving tray. The result? An irresistible combination of warm carbs and shiny decor. That’s a surefire way to get guests saying, “Oh yeah, this party’s got soul.”
Radiant Rainbow Pasta Salad
We’ve had a Neon Noodle Salad on the list, but Radiant Rainbow Pasta Salad is a different beast—it’s more about layering bright ingredients to create a literal rainbow. Think red peppers, orange carrots, yellow corn, green cucumbers, blue or purple cabbage, and so on. Use a neutral pasta shape like rotini or farfalle, which hold dressing well.
- Dressing: A simple Italian dressing or a homemade vinaigrette is fresh and light, letting the colors pop.
- Add-ons: Cubed cheese, olives, or beans can make it heartier. Just keep an eye on the color scheme so the final dish doesn’t look muddy.
- Assembly: Toss each veggie in dressing before layering so everything stays evenly flavored.
- Presentation: Serve in a clear bowl or a big platter. If you’re feeling ambitious, arrange the colors in arcs to really emphasize that rainbow effect.
The result is a salad that’s almost too pretty to eat (note: almost). Under disco lights, the array of colors might even look like it’s pulsing with the beat. Plus, it’s another relatively healthy option to balance out the sweet and salty treats. People who love to Instagram their food will go bananas over this one, so be prepared for some social media action. Best of all, this salad can hang out on the table for a while without losing its oomph—perfect for a party that lasts all night.
DIY Disco Dessert Bar
If your party vibe is more “let them eat glitter” than “serve them a single plated dessert,” a DIY Disco Dessert Bar is a no-brainer. Think of it like a build-your-own extravaganza that includes brownies, cookies, mini cakes, candy toppings, and glitzy garnishes. It’s interactive, it’s visually stunning, and it’s guaranteed to get your guests unleashing their inner dessert artist.
- Station setup: Cover a table with a sequined tablecloth. Arrange different treats in bowls or on stands at varying heights.
- Toppings galore: Edible glitter, sprinkles, crushed candy bars, chocolate chips, marshmallows—go wild. Provide whipped cream, frosting, and sauces like caramel or chocolate for drizzling.
- Disco décor: Scatter mini disco balls or use disco-inspired signage that reads “Treat Yourself” or “Stayin’ Alive (with sugar).”
- Guest involvement: Put out small plates or cups so guests can assemble their desserts. You might see combos like brownies topped with whipped cream, sprinkled with edible gold stars, and drizzled in chocolate sauce.
A DIY Disco Dessert Bar is the ultimate expression of party creativity. It’s more than dessert; it’s an experience where people can mingle, compare their sugar-laden masterpieces, and snap photos. Whether it’s kids piling on gummy bears or adults carefully crafting a gourmet chocolate tower, everyone gets to have fun and indulge. It also takes the pressure off you to plate and serve each dessert, freeing you up to actually enjoy the party. That’s a sweet deal in my book.
Kids’ Funky Food Station
Throwing a family-friendly disco bash? You’ll want a dedicated kids’ station. Kids’ Funky Food Station is all about bite-sized, interactive foods that keep little ones entertained and fed. Think mini pizzas, fruit shapes, veggie sticks with colorful dips, and maybe even make-your-own cookie kits. Arrange everything at a lower height so kids can reach it comfortably.
- Themes within a theme: Label each food station with a silly disco name like “Tiny Dancers’ Pizza Corner” or “Groovy Fruit Lounge.”
- Hands-on: Provide cookie cutters for shaping mini pizzas or fruit. Kids love the control they have over what they eat (and it might encourage them to actually eat the healthy stuff).
- Bright visuals: Neon plates, disco ball sippy cups, and even a simple disco light pointed at the station can make it feel special.
- Mess management: Keep wet wipes or napkins close by. Trust me, pizza sauce plus disco dancing can get messy fast.
This station is a godsend for parents who are busy chatting or dancing but still want their kids to have a blast. Plus, it keeps the kiddos occupied, so grown-ups can join in on the main dance floor or snack table. And hey, if some adults wander over to sneak a mini pizza or two, who can blame them? Sometimes kid-approved food is the best part of the party.
Ultimate Disco Dessert Extravaganza
Finally, if you want to cap off the night with a showstopping display of sugar and sparkle, the Ultimate Disco Dessert Extravaganza is your grand finale. This isn’t just one dessert—it’s a lavish platter combining several of the ideas above. Picture a giant table, layered with a mirrored runner, hosting an array of mini cheesecakes, mini cupcakes, donuts, fruit skewers, glitter popcorn, and more.
- Focal point: Place a large disco ball in the center or hang one right above the dessert table. Shine a spotlight on it so the sparkles dance across the entire spread.
- Coordinated color scheme: Even if each dessert is different, tie them together with a common accent color—like silver glitter or a certain type of sprinkle.
- Signage: Cute labels like “Stayin’ Sweet,” “Boogie Bites,” or “Disco Delights” make the display memorable and fun.
- Interactive elements: Offer a small frosting station or a chocolate fountain off to the side so people can personalize their treats.
This is the place where all your disco dreams come together. It’s a visual and culinary feast that leaves guests on a sugar high—dancing, laughing, and snapping photos to capture the memory. You’ve got the eye-catching presentation, the mouthwatering variety, and the undeniable disco flair.
If you manage to include even half the ideas on this list, your disco party will go down in history as the one everyone still talks about next year—and maybe the year after that. After all, the 70s taught us that good times and great music never truly go out of style, and neither does great food. So crank up the tunes, shine that disco ball, and let the extravaganza begin!